Massimo Altieri
Flight Simulation Site
Home Cockpit building report
The dream begins... page 1
The 737 project page 2
The 737 project page 3
The 737 project page 4
The 737 project page 5
The 737 project page 6
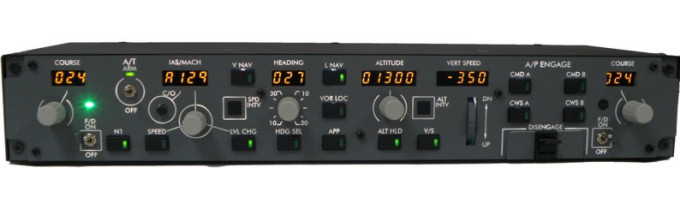
OpenCockpits MCP V3
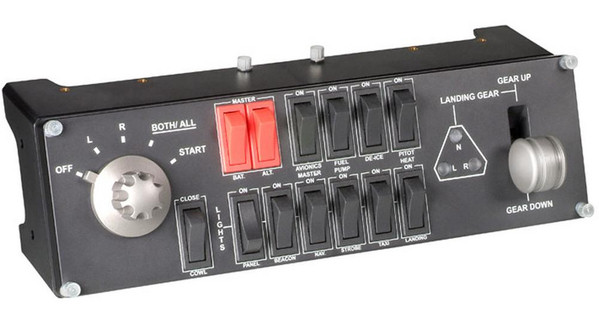
Saitek switches
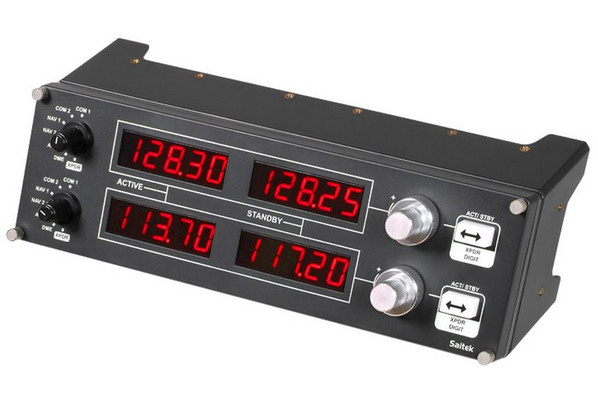
Saitek radio panel
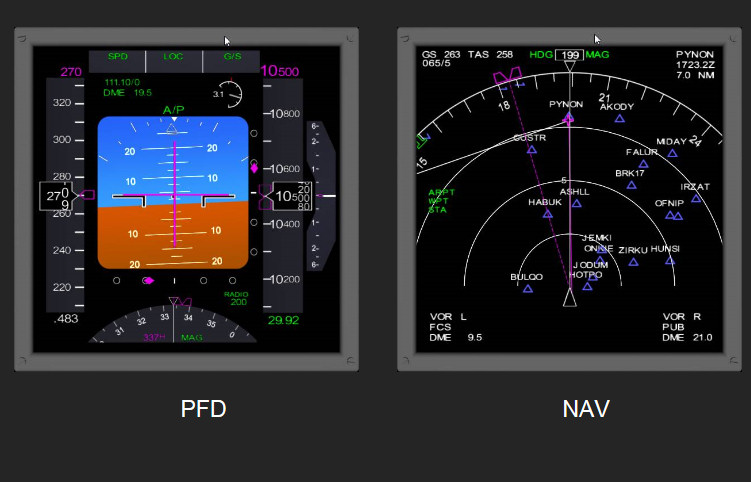
CRGSim suite
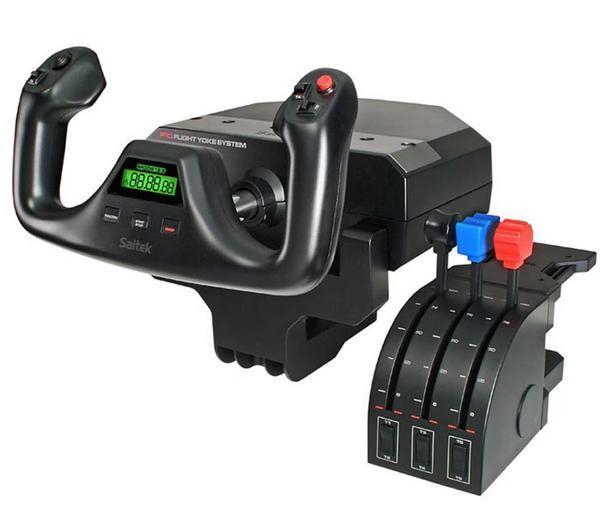
Saitek ProFlight Yoke
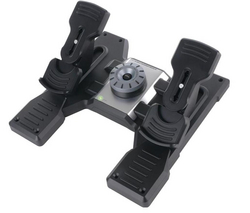
Saitek rudder pedals
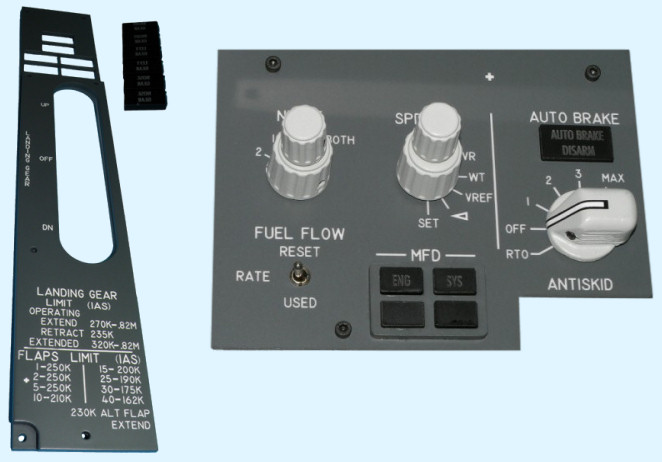
MIP panels
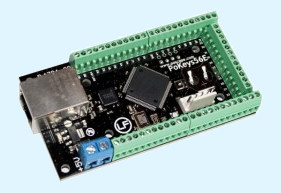
Polabs POKEYS 57E

Polabs POKEYS 57E
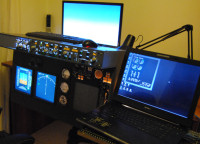
BOEING 737 Home cockpit construction history - page 3
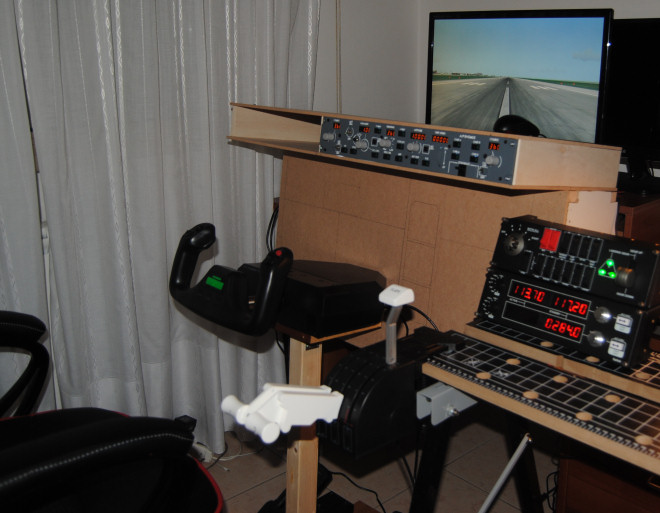
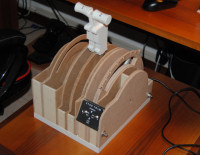
The 737 project gets hardware.
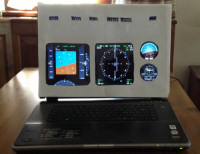
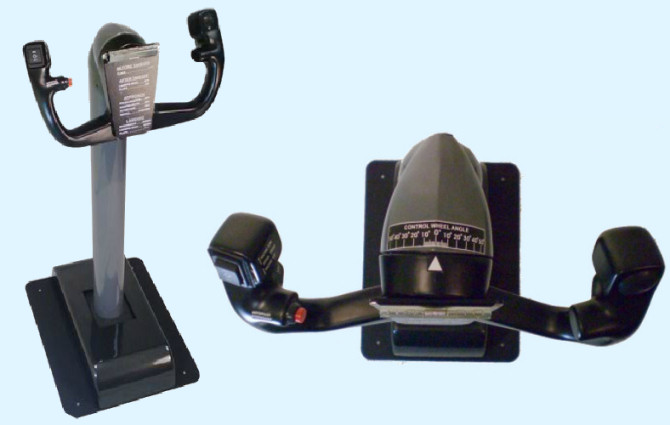
Yes, this doesn't yet looks like a real 737 cockpit, I admit that, but if compared to the paper and glue panel of the previous phase, this one presents a little difference... IT WORKS.
I mean, it is just an OpenCockpits MCP V3 and a Saiek Yoke with a TQ, but they are already interacting with FSX, and they are more or less in the correct position; in this phase I could test the ergonomic aspects of the layout, and the relative position of the various components.
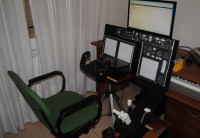
A very big issue is the shape of Saitek yoke, with a very large base that holds the stem of the yoke. This is not realistic at all, since the real 737 yoke has just a column like you can see in the picture below.
As usual, if you want a good 737 yoke you can find it, e.g. on http://www.simw.com/737-yoke-captain.html for about 1550 euros, and many other models from different producers, but (did I mention it before ?) I want to keep my cockpit just a hobby, and not spend as if I were buying a new car!!! My buget was increased from 1000 to 2000 euros by now, but it was already clear that I would have soon reached 3000 (including a lot of tools, screws, bolts, panels, switches, etc.) even if I tried to avoid accurately all expensive components.
So for now the Saitek yoke was OK, and I solved the issue by accurately positioning the base aligned with the bottom of the MIP. I had to create a wooden base with a fixed column for the yoke.
Now it is time for 2 important choices :
1) select the panels for the MIP (gear panel, autobrake panel, etc).
2) select the hardware interface to control switches, lights, encoders, potentiometers, etc
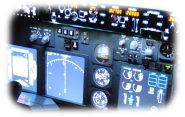
For the first item I chose Opencockpits (http://www.opencockpits.com) for landing gear panel and captain's annunciators,
and HISPAPANELS (http://www.hispapanels.com) for Autobrake panel and DU panel.
For the second issue there are many options : Opencockpits, Leo Bodnar, Arduino, and many others. All of them have advantages and disadvantages that must be examined and evaluated to decide which one suits best your needs, but after many days of thoughts and comparisons I chose Polabs POKEYS 56E (now POKEYS 57E) from http://www.flightsimparts.eu
This small and apparently simple board is unbelivably powerful and easy to use; for less than 60 euros
Pokeys 57E offers you :
- Ethernet 10/100 with DHCP client or fixed IP support
- TCP connection with device
- 55 digital inputs with pull-up resistors
- 55 software controlled digital outputs
- 7 analog inputs (12-bit) with adjustable low-pass filtering support
- Up to 26 encoder pair inputs (3 high-speed encoder inputs, 1 ultra high speed encoder input)
- Up to 16x8 matrix keyboard
- Two 8x8 matrix LED display support
- Up to 6 high-speed fully configurable PWM outputs support (25 MHz PWM timer)
- HD44780-based character LCD support (up to 4x20 characters)
- up to 80 aditional External bus outputs are supported
- Modbus TCP support (access to digital IO, analog inputs, encoders counters, digital counters values, PWM outputs,
LCD display, LED matrix display, PoExtBus devices, matrix keyboard status)
- Support for communication with devices on I2C and 1-wire buses
- Support for Connection signal output
- Communication compatible with PoKeys55 on application layer (data packet structure)
- Unlimited units can be connected to one computer.
- Intuitive and user-friendly software.
- Third-party support via DLL library and extensive protocol specification document that allows porting to other systems
- Plug-in for Artsofts Mach 3 CNC software available under development
To make it really easy to use with FSX the site suggest you to get a (free) copy of
FSSYMPHONY software (http://www.flying-the-winglets.de/ReviewsHardware0.html#FSSymphony)

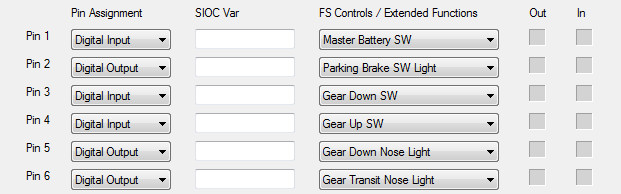
In the image above you can see a configuration page of FSSymphony. You can decide for each pin if you want a digital input (a switch, a pushbutton, a rotary selector) or a digital output, but many pins can be configured also as analog input (potentiometers) encoders (like those used for setting MCP values) servomotors (in "PWM" mode) or even 7 segments display. You will need specific expansion boards for leds and 7seg displays, but they are quite unexpensive, and very easy to connect, with no need for configuration. On the vendor site http://www.flightsimparts.eu you will find all required information and images of the connection drawing.
I will treat this subject later on in more depth.
Continue to THE 737 PROJECT page 4 -->