Massimo Altieri
Flight Simulation Site
Home Cockpit building report
The dream begins... page 1
The 737 project page 2
The 737 project page 3
The 737 project page 4
The 737 project page 5
The 737 project page 6
OpenCockpits MCP V3
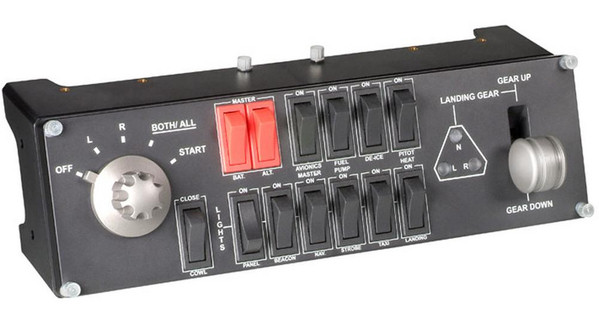
Saitek switches
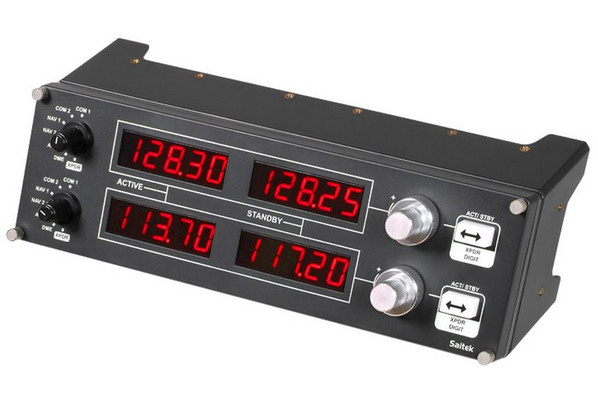
Saitek radio panel
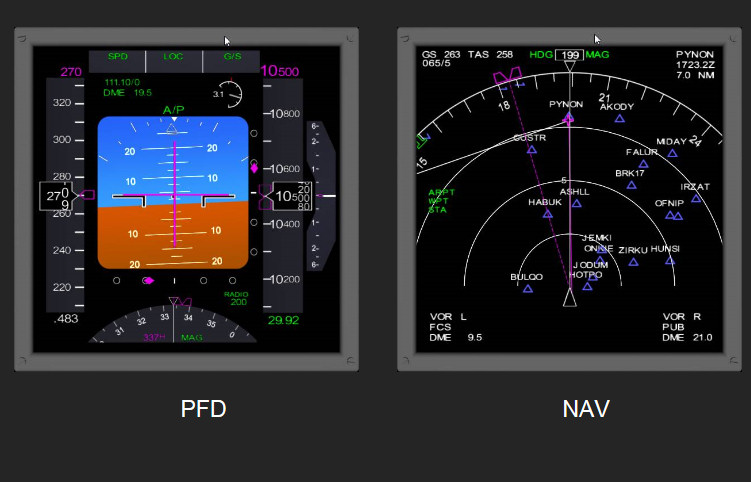
CRGSim suite
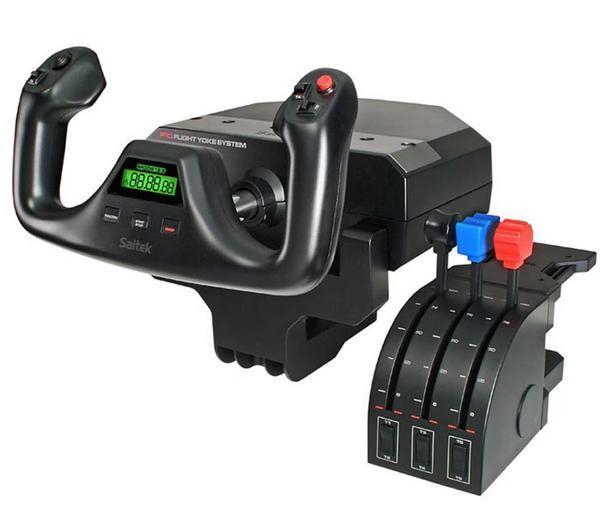
Saitek ProFlight Yoke
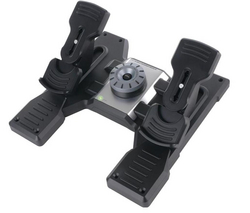
Saitek rudder pedals
BOEING 737 Home cockpit construction history - page 2
The 737 project begins.
The BIG second step was to change my target from generic panel to 737 cockpit!
But I had to change my budget calculations as well....
Now the main questions were :
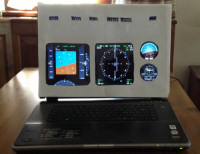
A) what software could I use for connecting the secondary PC to fsx and display the 737 gauges ?
B) what 737 hardware is available for interacting wiht fsx ?
C) how much should I spend - and how much will I accept to spend for this ?
Yes, these questions look very similiar to the previous ones, but there is a scale factor in between!
The procedure is still the same as before :
SEARCH, STUDY, SELECT !!!
On the net I discovered that 737 is almost completely reproduced in all its parts by a lot of producers.
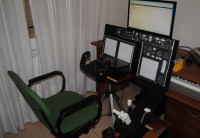
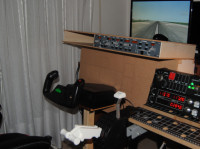
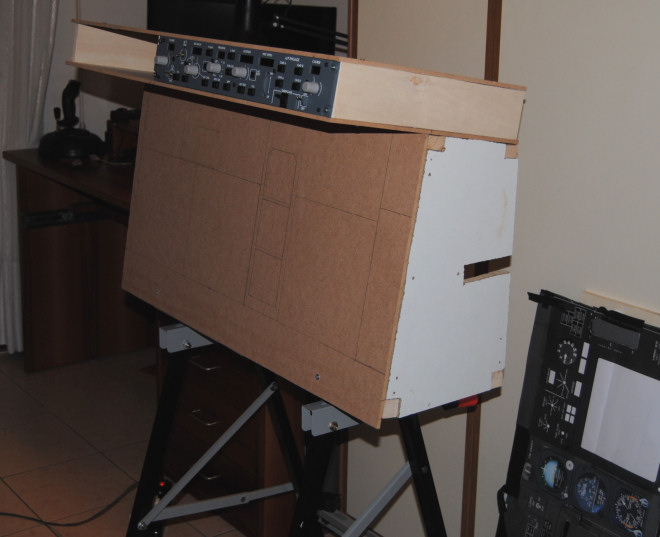
I bought a cheap plastic-paper board and I made some positioning tests, printing many A3 or A4 sheets with the MIP layout and glueing them on the board to rebuild it.
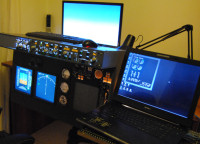
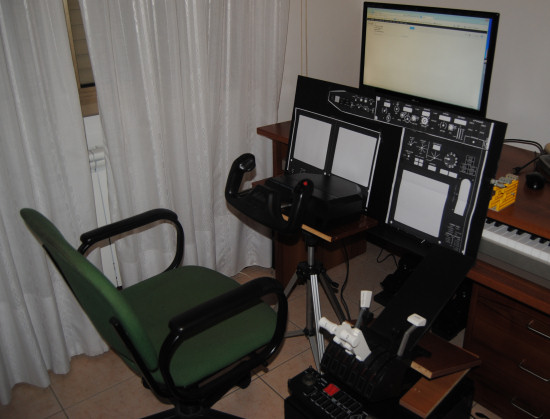
This phase is essential, because it gives you a lot of informations, and you can realize if the space is available, and how the structure will have to be supported, etc. In my case, I decided that I woul definitively NOT destroy my room to have a permanent 737 cabin instead of a table, a window, an usable PC, a musical keyboard....!

One point that was clear to me since the first basic project, was that the main panel would have to be very easily and quickly installed on my desktop, and working with the template I realized that the best way would have been to create 2 side rectangular holes where the horizontal plane of my desk would be inserted. This solution allows to simply slide the MIP into the table, and the weight does all is needed to stabilize completely the installation without any need for screws, clamps or other fixings.

So the next step is to create the main instrument panel base. For reference drawings, sizes, layouts you can be interested in looking at http://users.skynet.be/jcordon/cockpit/plans.htm
in particular http://users.skynet.be/jcordon/cockpit/dimensions/images/737NG_Panel.jpg
You can find some perfectly cut, powder painted and ready to mount aluminium panels; just to have an idea you can look at http://symulatory.com/strona/index.php from Poldragonet, or http://cockpit-for-you.com/ (they have also good looking standby gauges and other parts.)
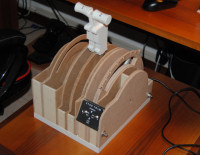
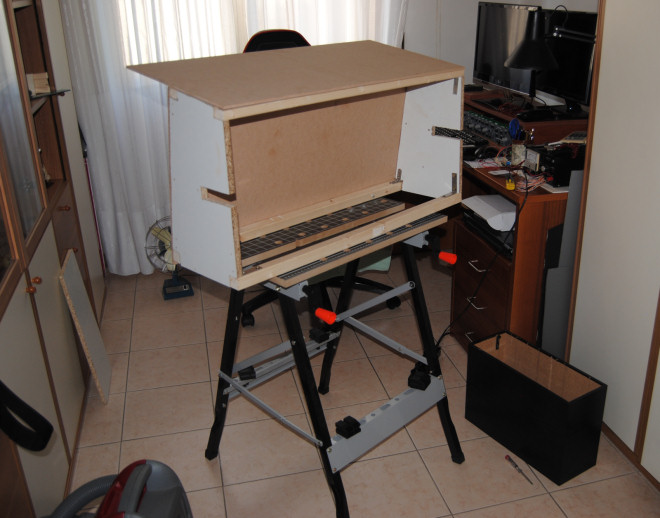
But I decided to make my MCP by myself using an MDF 6mm panel, mounted on a wooden frame as the pictures show.
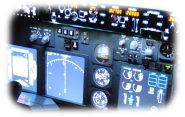
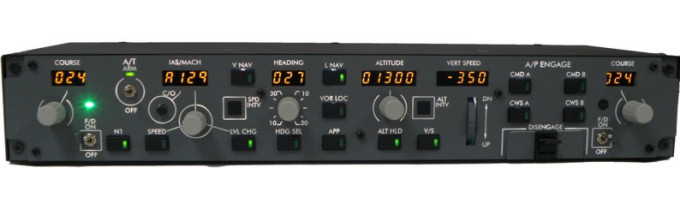
Before proceeding, it was necessary to decide what components I would have used, in order to be sure of their dimensions, connections, fixings, and so on. And after the usual search, I found the OPENCOCKPITS MCP V3, that for a reasonable price offers you a completely functional, and well backlighted 737 MCP.
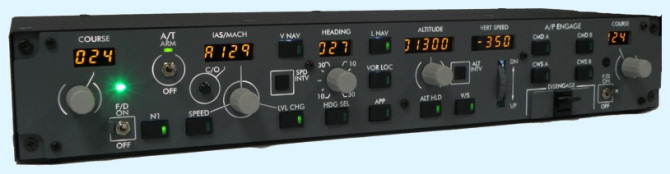
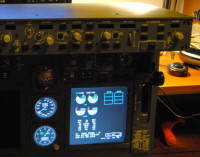
I bought it and after about 1 week it arrived from Spain, perfectly working with appropriate SIOC code. Well, that was not that easy, because there are many SIOC configurations included and you have to find the one that meets your needs, but once you find the right one the panel works great.
First I plotted the panels outline on the MDF plate, then the project is to cut out holes and paint it with RAL 7011 (water base paint) applied with a roller brush.
VERY IMPORTANT : since I decided to create only the left side of the cockpit (in order to keep the cost and the space needed as low as possible, I had to adjust some measurements; in particular I decided to slide the glareshield to the left in order to make it stay inside the area of MIP, and made the left wing of MIP (clock and altn noose wheel steering) stand alone and removable.
Continue to THE 737 PROJECT page 3 -->