From FitPlot 2.6 each image (or group of images) you insert or drop in the work area may have some preset automatically applied.
You can control this behavior from the preference panel (insert tab), just click on the icon in the tool bar.
You can even set this automatic task on / off acting on the tool bar button or .
If the button is not visible (it is not by default!) modify the tool bar to include it (see toolbar to know how).
Using this feature lets you import and show a folder of images, showing them resized and tidily laid out, optionally showing each one its file name tag as in the example below.
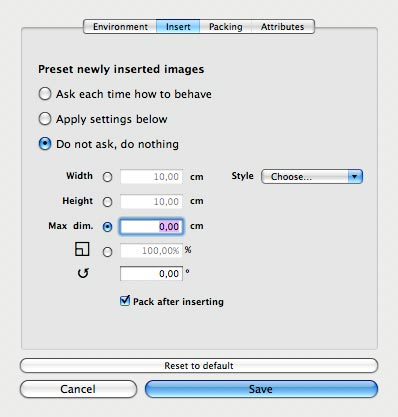
Insert preferences
Here you can establish how to behave when inserting new images on the FitPlot area (ask each time, apply presets, do nothing). The settings regards resizing, constraining height or width, rotating and applying styles as well as packing after insertion.
Width, Height, max dim. (between width and height) and Scale% let you resize the newly imported images. To be neutral in resizing, choose scale % and leave 100 as value.
Constraining the resize to max dim allows a "balance" between "portrait" and "landscape" images.
Rotation lets you rotate of the given angle (in degrees) the just imported image. Leave 0° for no rotation at all.
Style: here you can choose one or more from the available styles in the popup list.
Pack after insertion: check this to automatically pack all objects currently in the FitPlot document. The packing is done accordingly to the packing preferences.
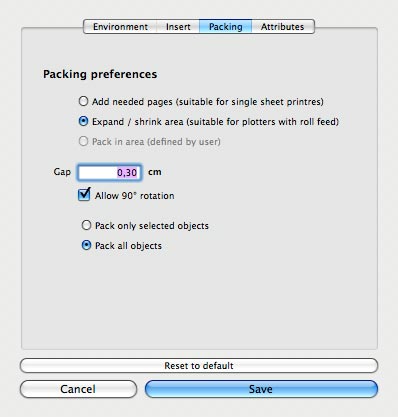
Packing preferences
The packing algorithm has been improved on last releases (on user suggestions). It includes now three behaviors:
the first suitable for users with single page printers,
the second suitable for plotters where the width is the roll width and the height is virtually unlimited and
the third is just to pack images in a user defined area.
Moreover it's been added the option to apply the algorithm just to a selection of the images instead of all as in earlier versions.
Add needed pages (single pages printers): in this case, the algorithm will try to fit images in the page area (if it is possible).
When the area is full, a new page is added and filled with the remaining images, and so on until no image has left.
Expand / shrink area (plotters with roll): this time the page will be only one, but its size will vary, shrinking or expanding to contain all images.
Images are placed fitting the width of the roll and increasing the page length any time is needed (new rows).
Pack in area: when insertion is done, the user will be prompted to define the area where the images should be packed. This area is defined by a mouse click and drag.
Gap: this value will be added to separate adjacent images.
Allow 90° rotation: if checked, a calculation will be performed to see if there is a convenience rotating 90° some image (in terms of Y values reached). If convenient the algorithm is performed with possible rotation on some images.
Pack only selected objects: the packing algorithm will consider only the currently selected objects. Note: at insertion end, the just imported images are the only one to be selected.
Pack all objects: the packing is performed on all objects currently inserted in the FitPlot document.