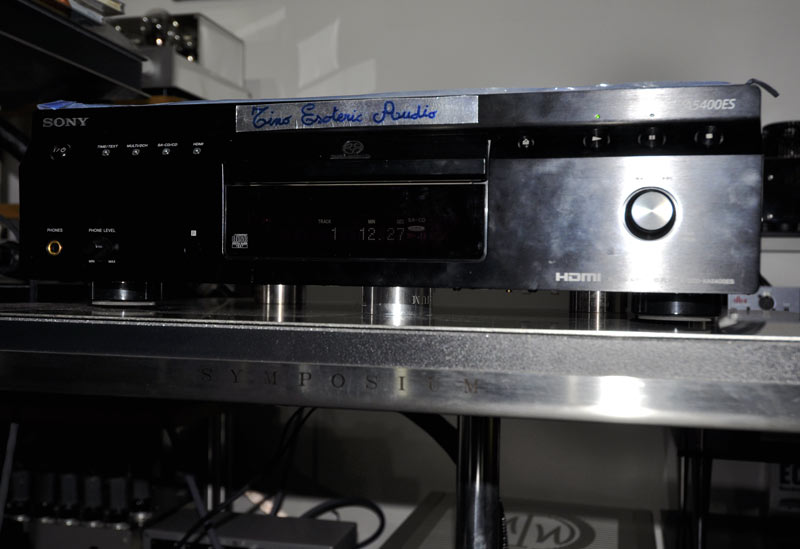
Doubling the effort on modding the Sony XA5400ES sacd player:
If you have read the first part of this DIY work for modding the Sony XA5400ES player you already know that I have replaced the OP-amp-based analogue I/V and output stages with discrete Jocko-Homo and double FET buffer stages for the two positive outputs of the DSD-1796 DAC. But that DAC has 4 current outputs, since it can run in a balanced mode (L+, L-, R+, R-) and hence I wanted to build two additional analogue circuits, before to proceed with other expensive mods, described at the end of this page.
The software trip:
Was that because I was not satisfied by the sound of my modded player? On the contrary, I was so happy with its sound that I decided to invest a lot of money in buying one hundred more SACD records, basically because I'm fearing that the SACD format is dying -what a pity!- and many good SACDs are already (2010) very hard to find.
|
|
|
|---|---|
|
|
|
To buy rare-famous SACD is a dangerous play. Is it worth? Well, yes, all the record shown in my rare classical SACD are very good (e.g. how cold I say that the 150$-costing Jansen SACD is less than spectacular?). But what I want to tell you is that there are some extremely well sounding SACD that you can easily buy (see Amazon) at a convenient price. The following are just an example, try them!

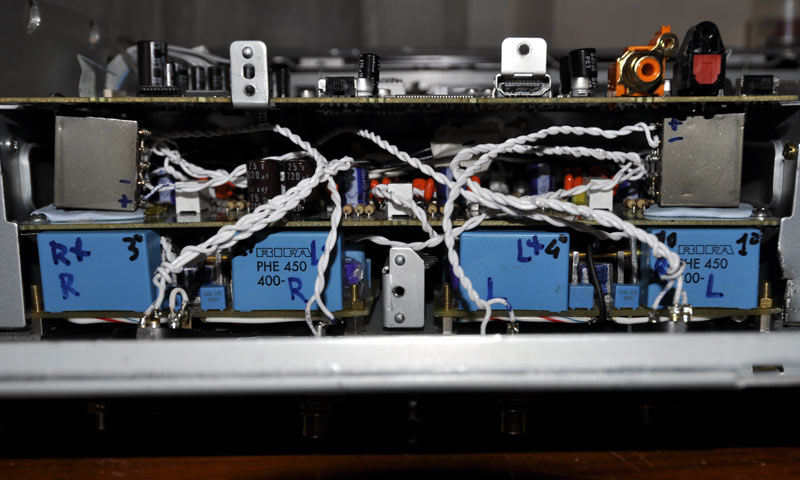
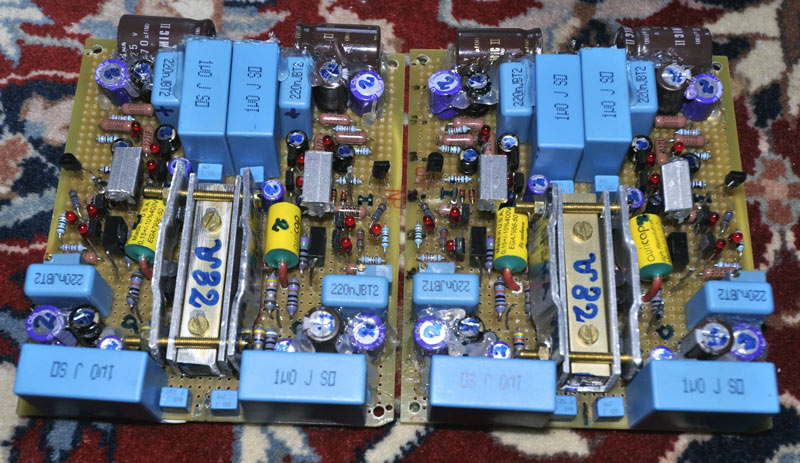
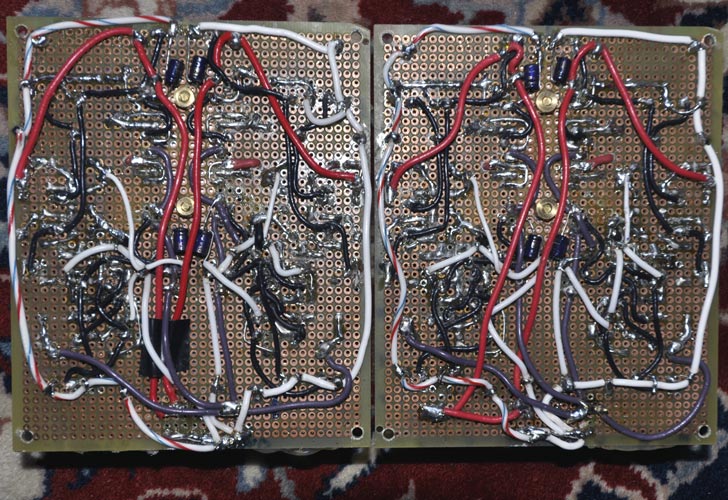
Doubling it:
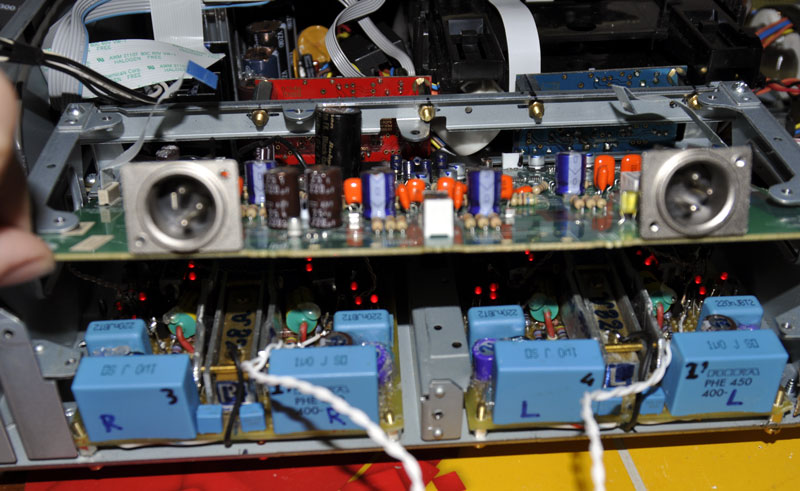
So, it was time to populate my full DIY audio boards and here you can see the result of installing other 2 I/V+buffer circuits.
|
|
|
|---|---|
|
|
|
 The
most difficult part of this work was to find pairs of really matched
FET. For three of the four circuits I had to use a corrective
resistor in order to decrease the output DC offset (bias) to
low levels. After many try-and-back work I was able to reach the
following DC offset values:
The
most difficult part of this work was to find pairs of really matched
FET. For three of the four circuits I had to use a corrective
resistor in order to decrease the output DC offset (bias) to
low levels. After many try-and-back work I was able to reach the
following DC offset values:
|
Channel |
DC offset |
AC reference output |
|---|---|---|
|
Right + |
+5mV |
175mV |
|
Right - |
+5mV |
174mV |
|
Left + |
+1mV |
177mV |
|
Left - |
-4mV |
173mV |
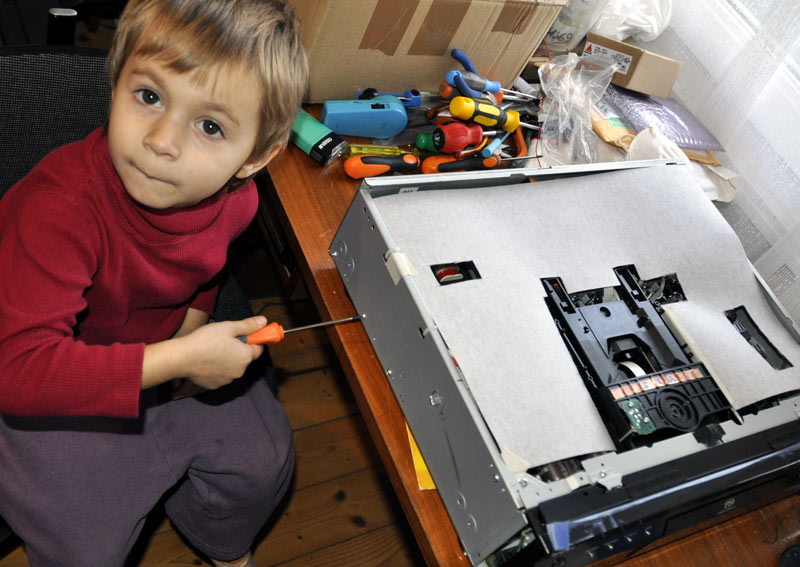
Where the AC reference output was obtained playing the track 5 of the XLO-Reference Recording Test CD. Luckily enough I was not alone in this journey, but a trusted assistant - my 3-year-old daughter - helped a lot!
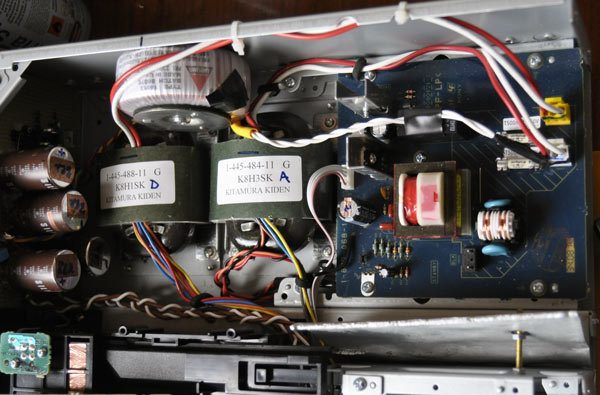
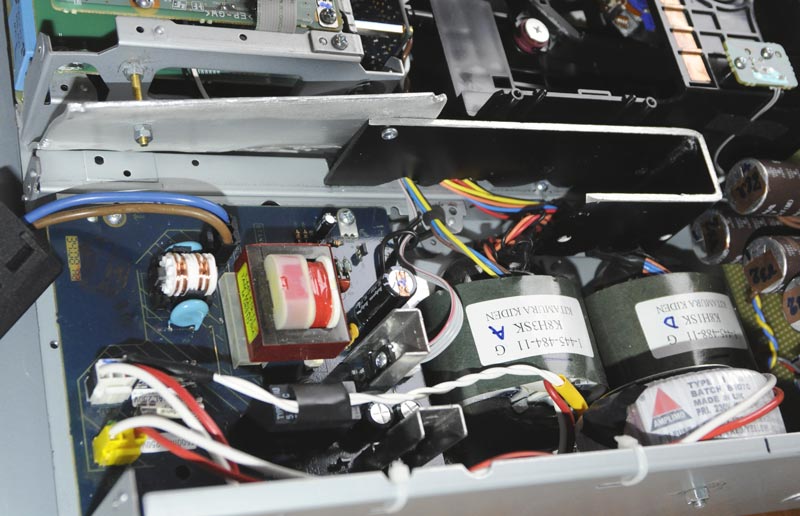
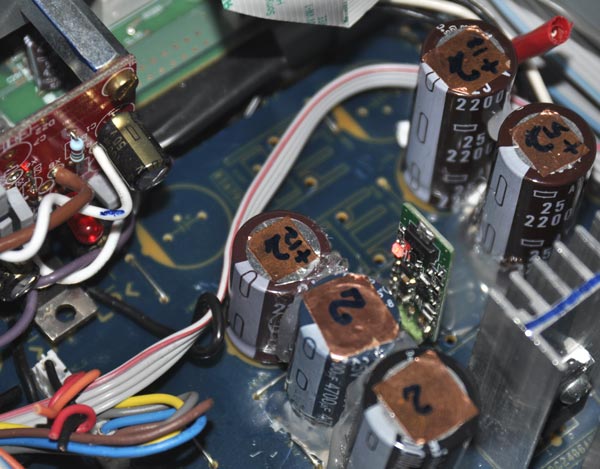
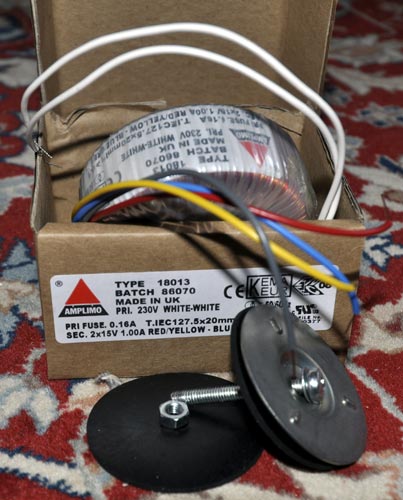
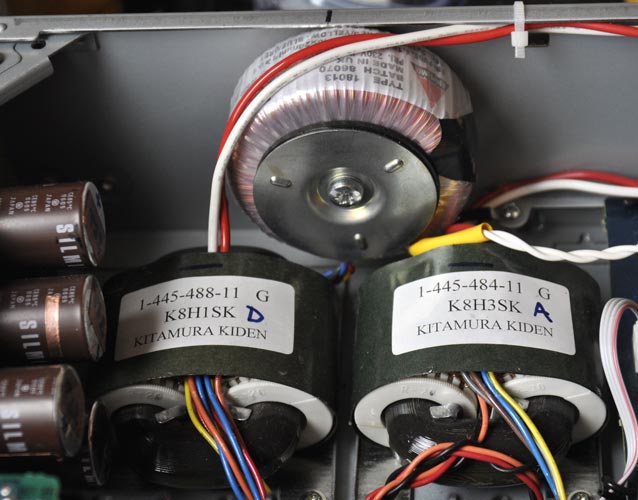
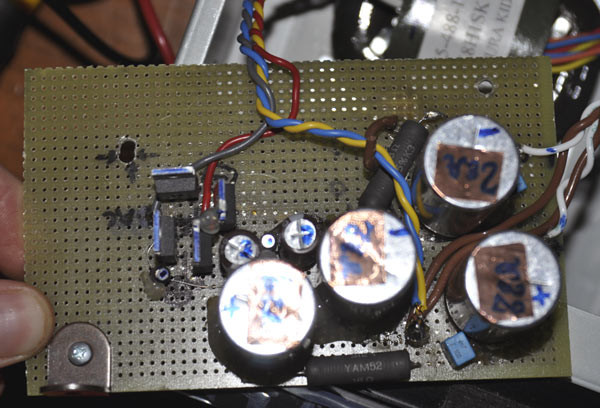
Unfortunately, when I powered these four circuits I had a problem. The adsorbed current (about 0.2A) was now too high for the original Kitamura Kiden K8H3SK power transformer! It happened that the transformer voltage output drop a little and the DC voltage after the rectifiers and caps (input of the 12V Sjostrom super-regulators) was a little too low (14Vdc)! So, I had to buy a new power transformer. I considered different toroidal (for space reasons) transformers, including Sowter, Plitron and many others, and at the end I picked up a good Amplimo 18013 (2x15V 1A rms), that should have been designed by the famous Menno van der Veen.
|
|
|
Unfortunately the voltage output (16Vrms) of the Amplimo was a little too high and now I had 19Vdc at the Sjostrom input! To fix this problem I replaced the two 3.3 Ohm Sfernice pre-regulator resistors with two Yamamura 18Ohm 5W (Yam52), so that now 3.6Vdc are wasted on these pre-regulator resistors. On the Sjostrom input I have now 16Vdc, that means 0.8W on the D44H11 power transistor, which is close to the maximum dissipation permitted when you don't mount it on a heath sink.
|
|
|
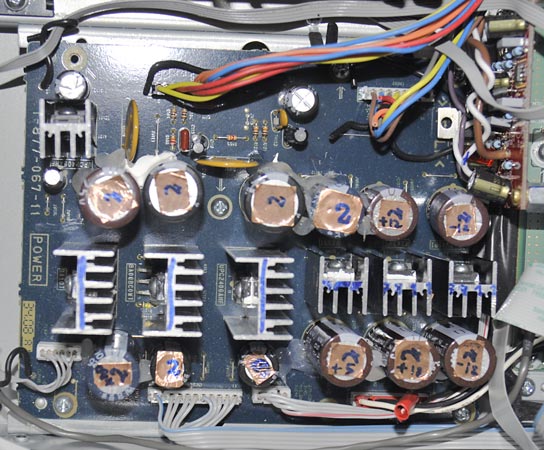
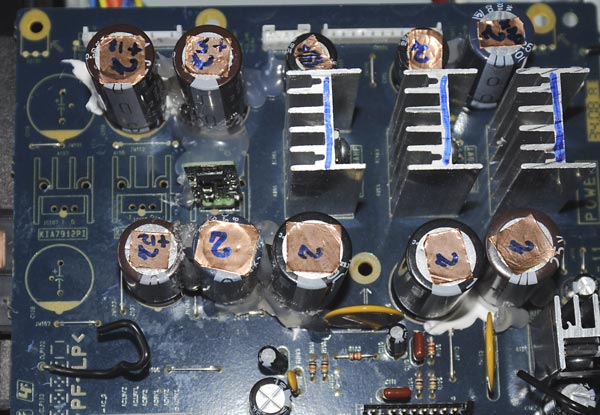
At that point I decided to improve a little also the other power supplies, but did not rebuild completely them as I did for for the analogue output PS. Here follow the a short description of these minor mods:
|
Power Supply circuit |
Original component replaced |
Mods |
|---|---|---|
|
5V PS for DAC and clock |
input cap, C106=2200uF 25V ASV Chemi-Com |
C106=4700uF 25V 105C JH // 0.1uF Black Gate NX 0.47uF 50V Black Gate NX in // toC117 (output cap) 0.1uF 50V Black Gate NX in // to the rectifying diodes input (across AC6V1 and AC6V2) |
|
10V PS for the motor |
output cap, C114=2200uF 25V AVF Chemi-Com |
C114=4700uF 25V 105C JH // 1uF 63V MKT 0.1uF 50V Black Gate NX in // to the rectifying diodes input (across M13) |
|
4V digital PS |
|
1uF 63V MKT // to C115 (output cap) 0.1uF 50V Black Gate NX in // to the rectifying diodes input (across AC4V1 and AC4V2) |
|
6V digital PS |
|
1uF 63V MKT // to C116 (output cap) |
|
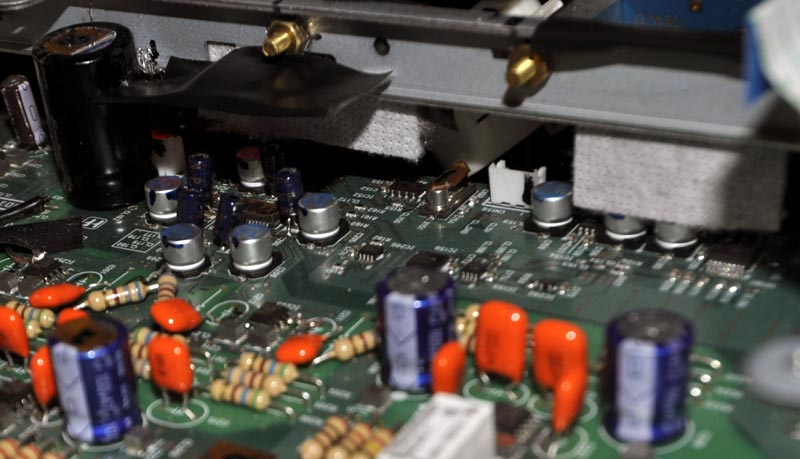
|
|
|---|---|
|
Rectangular caps: 2x 1uF 63V MKT (the third was installed after). |
|
Unfortunately I had not the time to test every one of this PS mods: I just did all of them together hoping that... it will not hurt! So, please, don't ask me if that was worth to do.
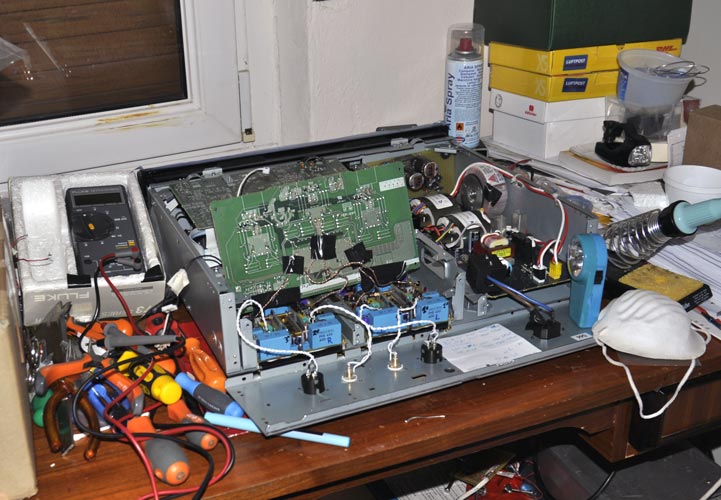
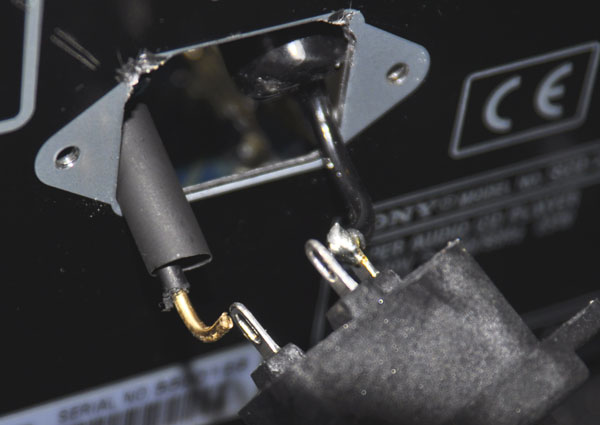
My
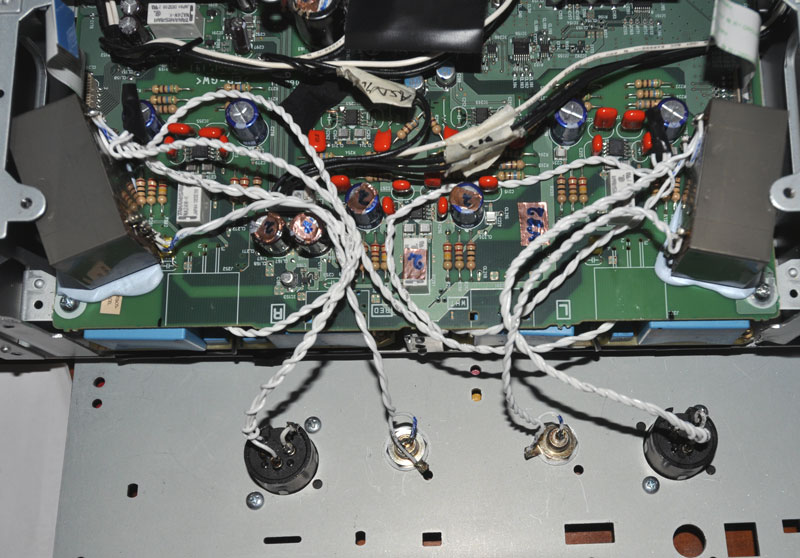
workbench was always very clean, as usual. I also replaced the
board-mounted plastic XLR sockets with a pair of panel-mounted
aluminium socket from Neutrik.
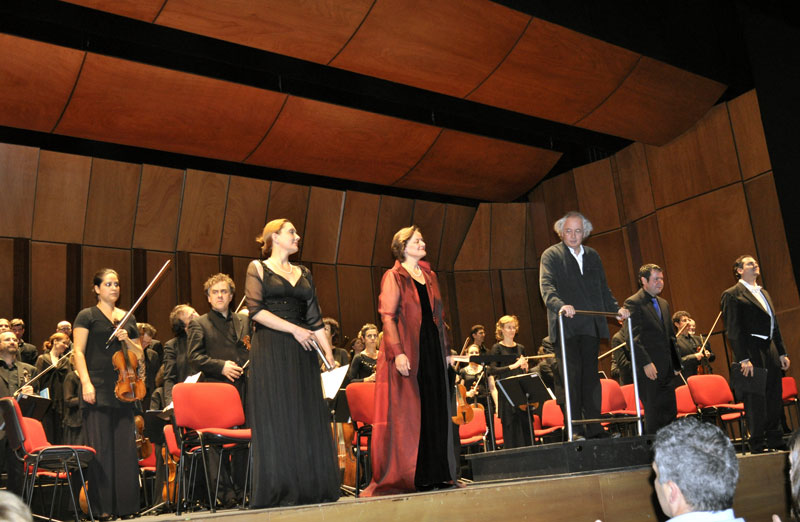
Then, I sow the light at the end of the tunnel and was finally able to power the four circuits with the new Amplimo transformer and Yamamura pre-regulators. I was really happy! It was about the end of October 2010 and I decided to make a Sony “4 circuits feast”. That means, it was time to listen no-compromise music and... I had the opportunity to listen live nothing less than Philippe Herreweghe conducting the Mozart's Requiem! Great!!!
|
|
|
|---|---|
|
|
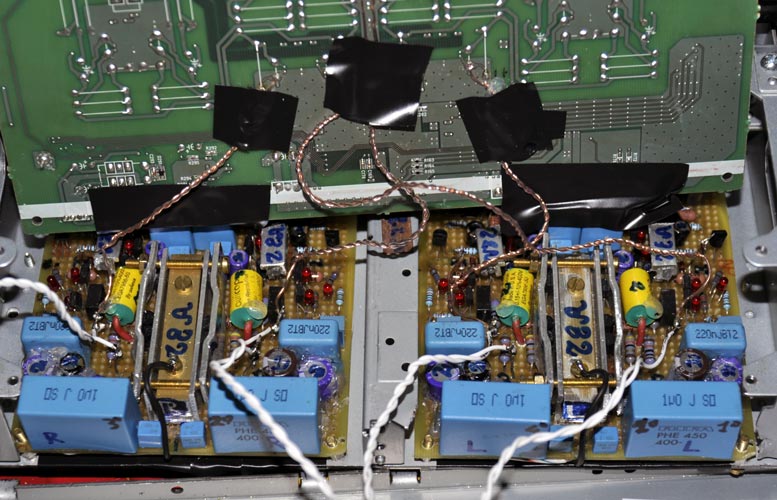
Transform it:
Now I was able to listen also to the negative DAC outputs, while connecting the positive DAC output to ground. Of course the sound was now similar to wait I have listened before using the positive outputs, but it seemed that the additional power supply improvements (including the Amplimo transformers) were able to improve a little the sound. But now I was finally able to realize my dream, that was not to use the balanced connection (I don't have a preamp with XLR inputs), but to sum the positive and negative outputs (after the I/V+buffer stage) and realize a sort of “mean signal”, that should get rid of any quantization noise.
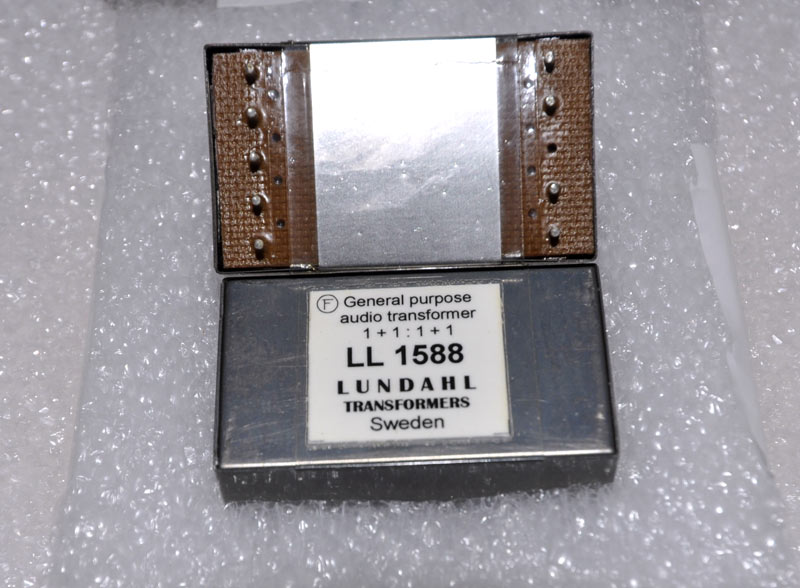
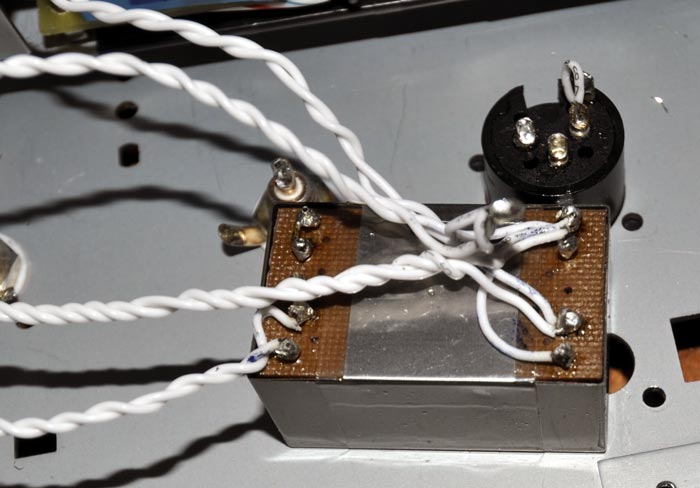
The best way to sum two voltage signals that I know is to use a signal transformer, so I started to look for a good output 1:1 transformer. I focused my attention on the following three: the Sowter 3603, the Jensen JT-11-BMCF (suggested also by Pedja Rogic) or the amorphous Lundahl LL-1684. I was very tempted by the most expensive Jensen, but its large dimensions was claiming for an external mounting and also the absence of a mu metal cant was scaring me. The only one which could be inserted in between the Sony boards was the rectangular Lundahl. So I chose the LL-1684. But then Per Lundahl told me that his amorphous transformers don't like any bias at all and suggested me to use instead of the amorphous-core LL-1684 the mu metal lamination core LL-1588. So I tryed it.
|
|
|
|---|---|
|
|
|
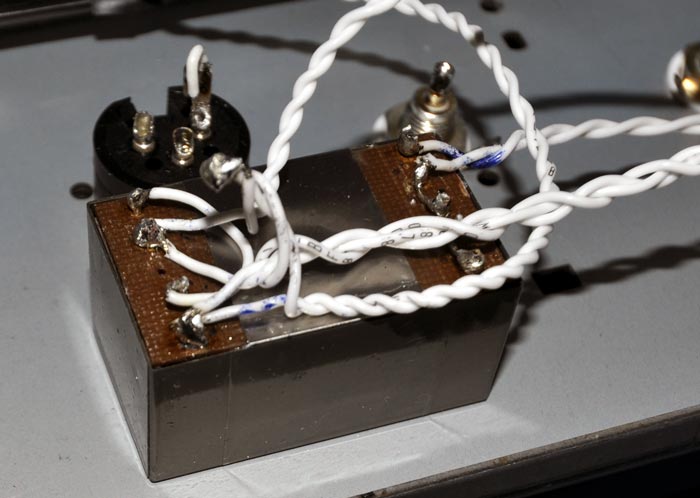
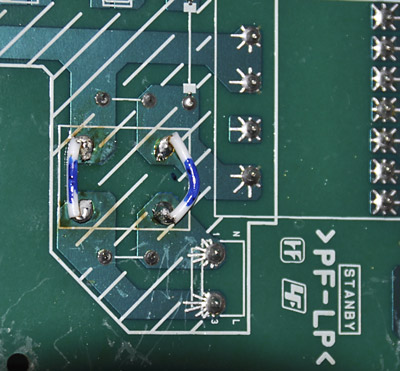
Following the Per Lundahl suggestion I connected the LL-1588 coils in series, that is connecting the V+ and V- outputs of each channel respectively to the higher and lower input of each input coil, shunting together the two middle pins. On the output side, I connected together the middle pins and used the higher and lower pins as single ended output. The lower pin of the secondary was connected also to the electrostatic shield of the transformer. In such a way the original ground of the Sony has not been connected to any of the transformer pins and the ground reference of the “cold” SE connection is taken from the following device (the preamplifier). That is the galvanic isolation magic. In that way I built a maximum 2V rms SE output starting from the the two maximum 1V rms balanced connections.
When
I first listened the new SE output I was really surprised of how much
the sound have changed. First of all it was much more “strong”
not just because of the higher signal level (3dB more), but because I
was hearing a more robust mid-bass response. Second, the sound was
more “lively and dynamic” than before. All the
best? Well, to be honest I was feeling a sort of less richness in the
high frequency domain, but not as if there was a frequency cut-off,
but as if the harmonic structure of the sound has changed. That was a
major concern for me and I have done more test, described below.
Trick it:
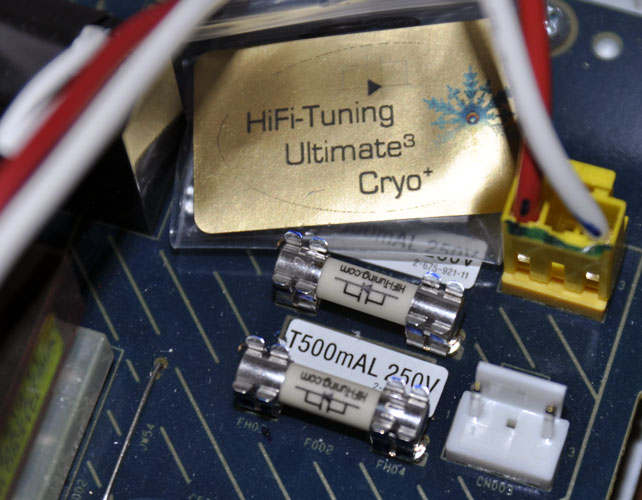
At this point I was even more satisfied of the results that I decided to invest on this player all that I can do. I applied three other modify that are so good that I really suggest to everyone to apply them. The first trick was to replace the original Sony fuses with 2 wonderful Hi-Fi Tuning Ultimate3 cryogenic fuses. Listening these two fuses through my modded player brought new live in the high frequency response, were they really “opened” it even more. I suggest this very simple and relatively cheap mod to anyone!
|
|
|
The second “no-brain” mod was to add a lot of e Stillpoint ERS cloth EMI/RFI shielding (bought from Michael Percy), that was able to make the sound more “clear”. I tried to put it above the power transformer section (left side), or above the digital board (central back) or above the regulators board (right side) but it seems to me that the best results were obtained covering all the three together.
|
|
|
|---|---|
|
|
|
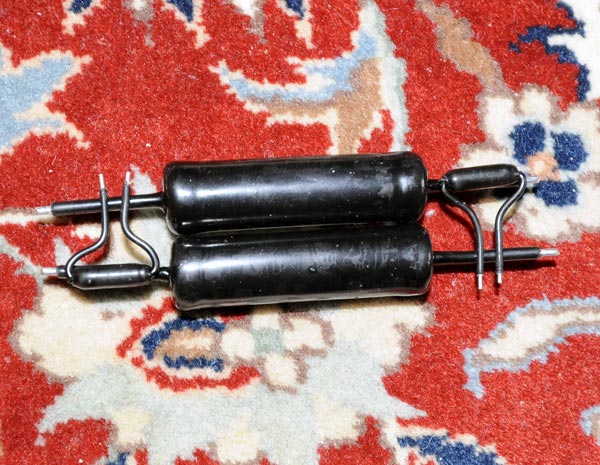
The last trick was not so “no-brain” because of the higher cost,but after listening the results I have no reserve! The mod consist in adding a large Bybee quantum purifiers on both the phase and on the neutral plugs of the main AC socket.
|
|
|
|
|
|
If you don't know the Bybee quantum purifiers I will not try to convince you how much good they are. I'll just tell you that I have found them at a relatively good price (~80$) from VH-audio (Chris Venhause) and that their effect is much more dramatic than either the Hi-Fi Tuning fuses or the Stillpoint ERS cloth. I was told to use only one on the phase, but I mounted one also on the neutral to burn-in it (they need a long break-in period, as is for the HiFi Tuning fuses) and the sound improved so much that I have not yet found the time to unsolder the neutral-wire Bybee and compare if it plays an important role or not. The effect of Bybee installed in my SACD player is highly audible and can be shortly described as a much higher clearness and focus. The golden version sounds even more detailed and “natural”.
|
|
|
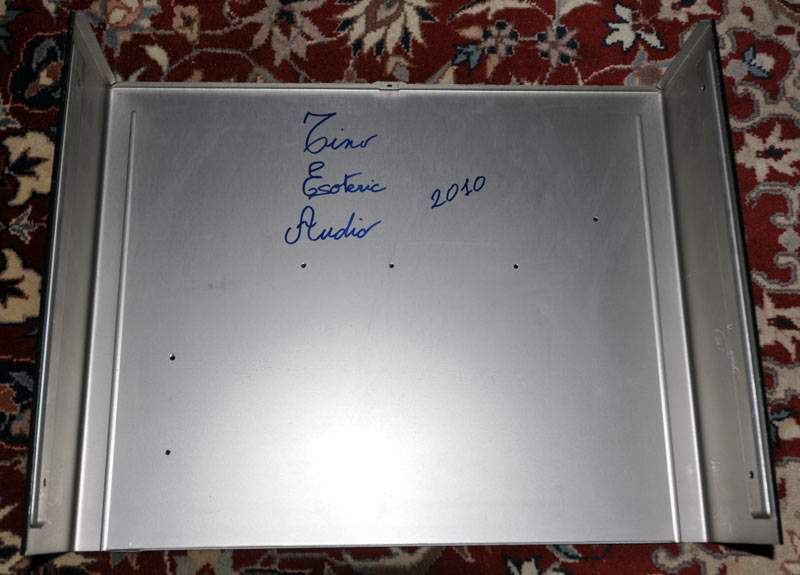
The last touch was to add three aluminium boards to shield the digital and analogue boards from the EMI/RFI radiation coming from the power supply and to do six 3mm holes on the Sony cover, to favour air circulation.
Test it:
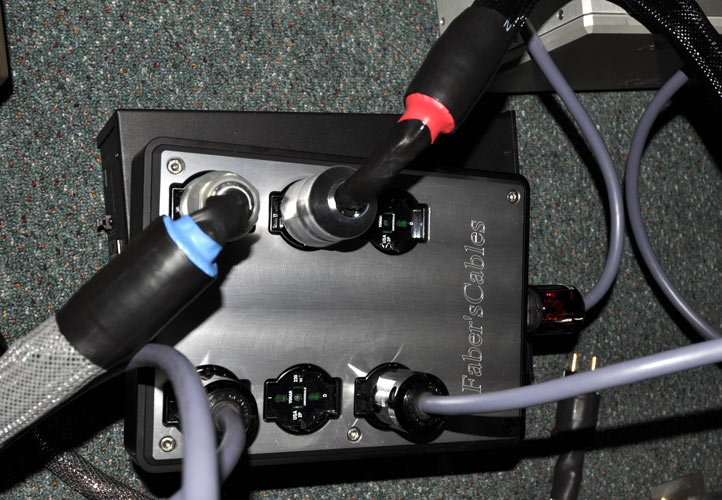
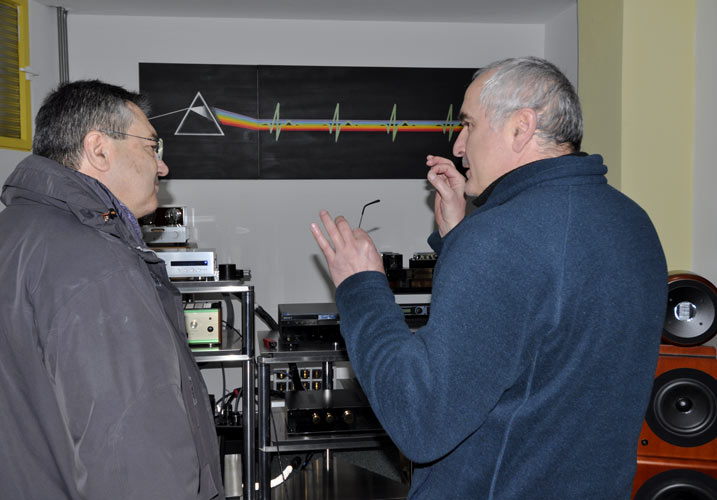
At this point I was able to test the result also in other systems. In particular I was very interested in listening the difference between the transformer-made SE output and the balanced output, to characterize the transformer signature – if any. I visited the Sergej system, that has an integrated amplifier with both the SE and the balanced inputs. The result was encouraging from one point of view and frustrating from another one. It was encouraging because the sound obtained with the balanced connection was a little better (but for the very bass response) than the Electrocompanient EMC1 CD player used there, but was frustrating because the unbalanced connection was much slower and close with respect to the unbalanced connection. That was not due to the cables, because we noted it with both the Faber's Cables (a wonderful XSolution balanced vs. a not-top-of-the-line unbalanced one) as with the Mit Shotgun S1 (equal for both the connections). Then I thought that it should have been a problem with the Lundahl tranformer, but to be sure I gave my Sony player to Faber's Cables (Fabrizio Baretta) to test it in his system.
|
|
|
|
|
|
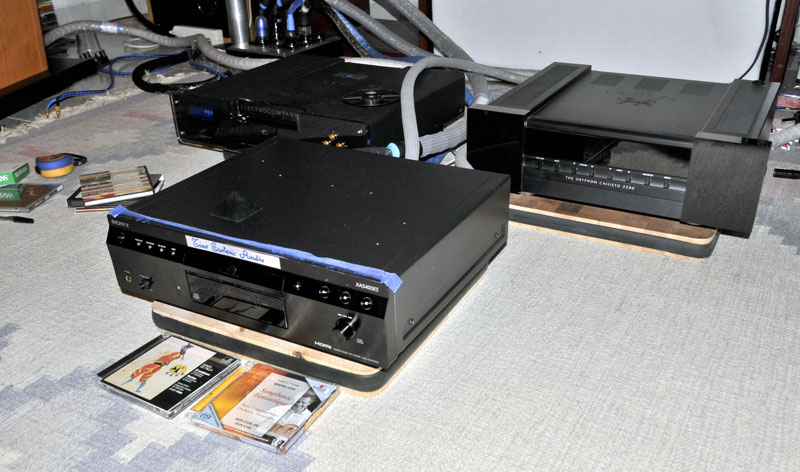
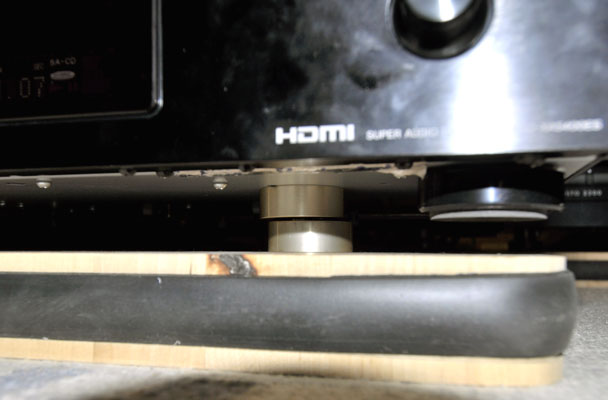
Fabrizio tested it with an Audia Flight “Flight Pre” preamplifier and a balanced Ayre V3 power amp, finding a not so evident difference between the two outputs (SE vs. balanced). He told me that if he really had to prefer one of the two, then he would chose the unbalanced (SE) connection, because he was feeling a warmer mid-bass without any detail loss in the high frequencies. That surprised me and the only explanation that I can find is that the problem that I have listened in the Sergej system was due to the unbalanced input of the Callisto amplifier. For example, it could be that the unbalanced signal is transformed into balanced inside the amp using a “bad” OP-amp stage? Dunno, but for now I'll not change the Lundahl output transformer. Moreover, Fabrizio told me that the sound of the modded Sony XA5400ES was not so far from his top Krell transport (KPS 20t) associated to his Chord DAC64 D/A unit (when playing RedBook CD): not so bad, isn't so? Even so, he told me that the top Krell transport with his hand made tube-based TDA1541 double crown DAC (similar to the Thorsten Loesch Adagio) was able to produce a much more real sound of the human voices. Also in the Faber system the Sony sounded better above the Daruma feet (even comparing with the expensive Combak-Harmonix RFS-66 feet).
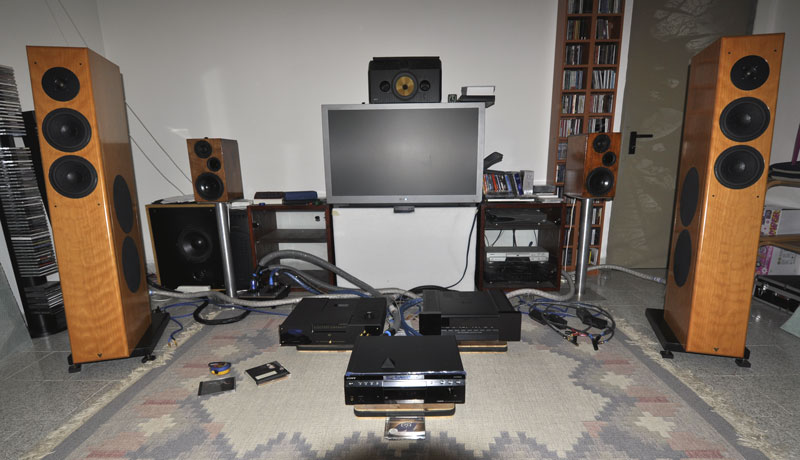
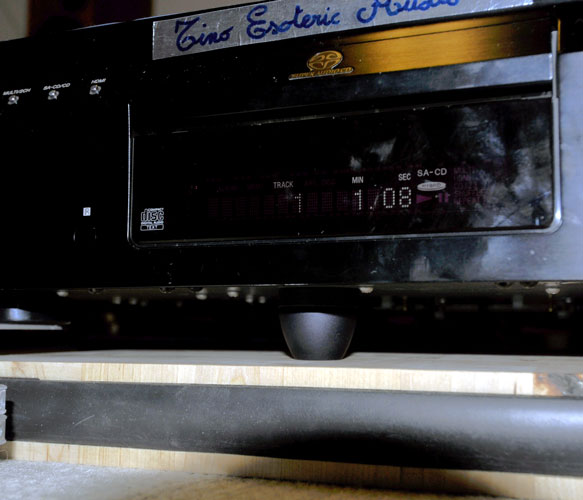
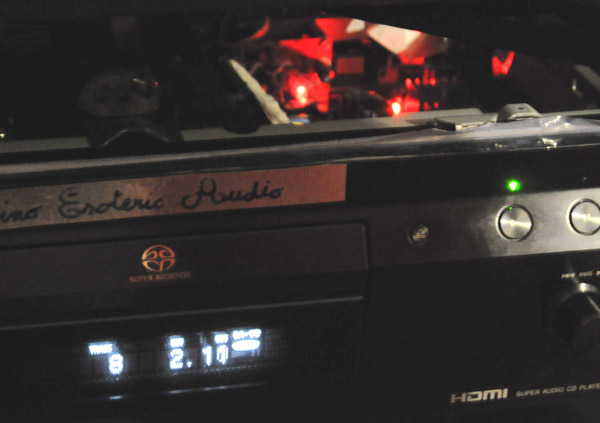
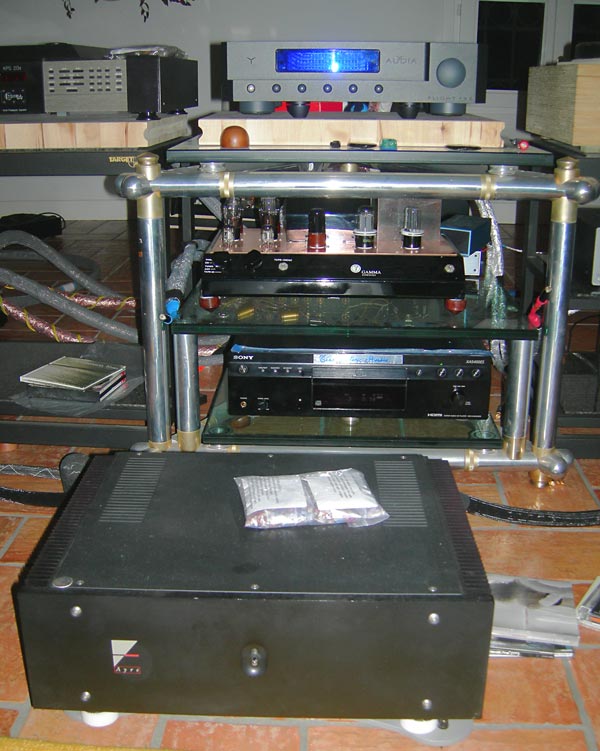
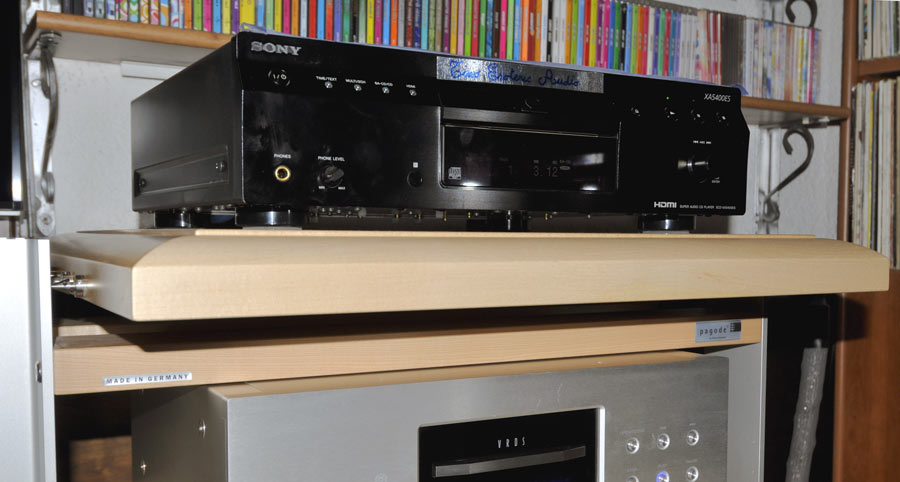
Then we tried the Sony in another top system, with really good and expensive JBL speakers (K2S 9800SE). The integrated amplifier was the Gryphon Diablo, while the owner (“Einstrain”) source was an expensive Esoteric X01 Limited Edition SACD player. As you can see above, the rack was a wonderful Finite Elemente “Pagode”. Comparing the SE output vs. the balanced output of my Sony I have found not so much difference as was in the system with the Gryphon Callisto. Basically it seemed to me that the balanced output had more air and details, while the SE (transformer-based) output was warmer and with more body in the human voices. The system owner preferred the balanced output, while Faber still preferred the SE output. For me it was important that they were not so much different. Interestingly, the SE output was sounding louder than the balanced and that is a prove – for me – that the SE input is internally converted in a balanced one by an additional stage inside the Gryphon and that probably doubled the voltage amplitude (3 dB louder). When we switched to the Esoteric X01LE what immediately hit me was a much stronger and deeper bass, but Einstrain told me that he was able to hear also finer details in the highs.
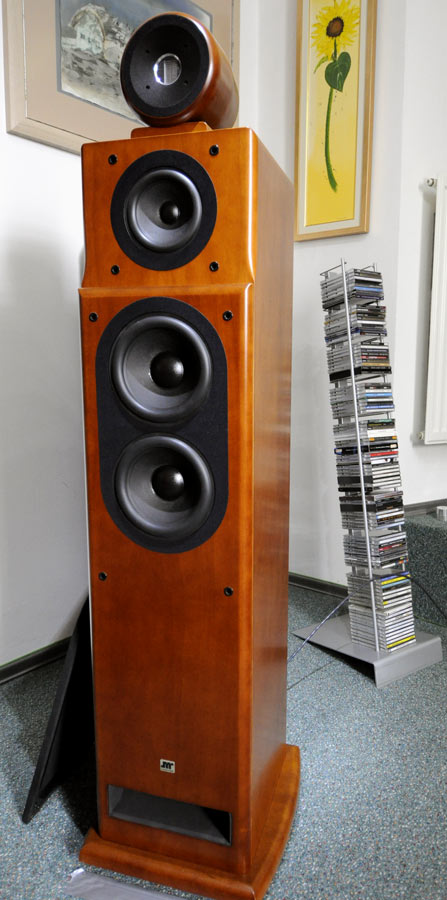
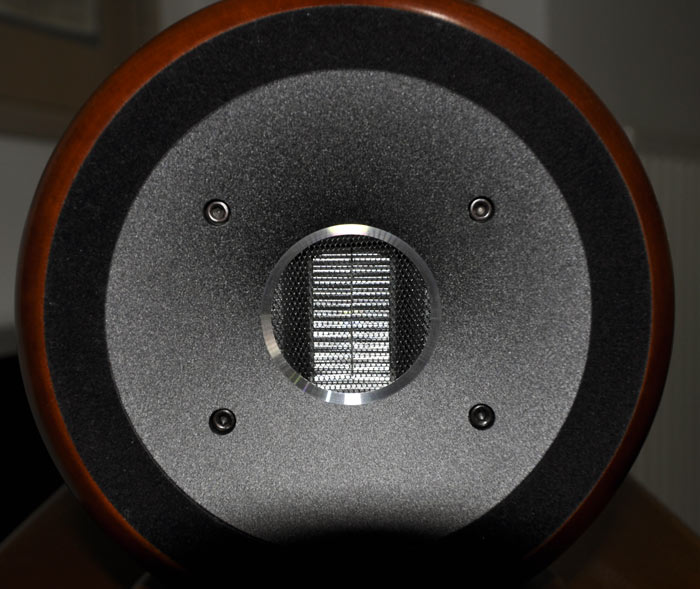
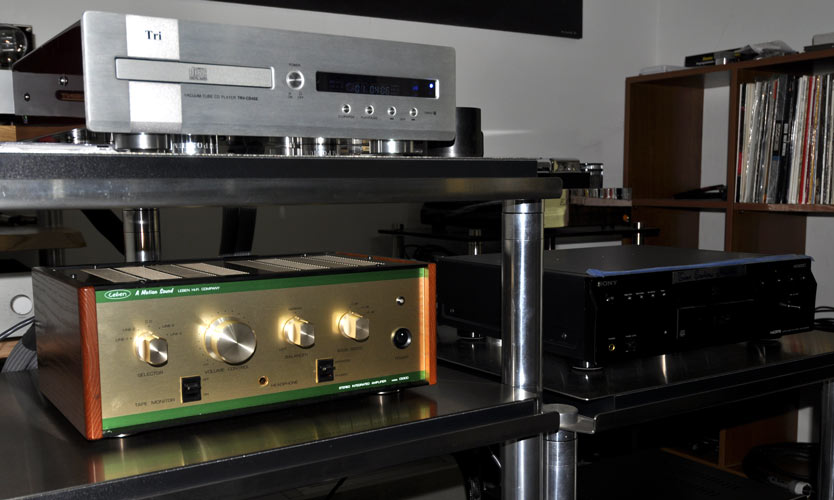
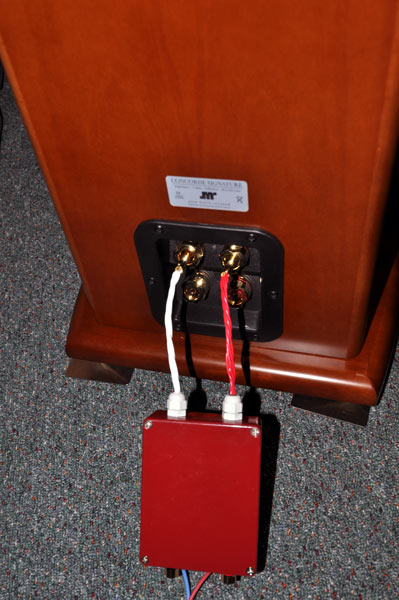
The same day I went with Faber to the Nel Audio shop in Ljubljana (SLO). There we found a relatively “simple” system, built around a 12+12W integrated amplifier: the delicious Leben CS-300 (sold at about 2500 Euro by Canyon Audio). The speakers were the interesting Jean Marie Reynaud (JMR) Consonance Signature, while the CD player was the Tri CD4SE with tube-based output stage. At the beginning the sound was not too much involving and I was missing most of the bass information. Then we “Faberized” the whole system with an interconnect cable, two power cords (a level-3 for the source and a XSolution for the amp), the Faber's Cables special “adapters” prototypes for the power cords and the speakers cables (which were from Duelund) and, lastly, the wonderful FaberSix power distributor socket. Lastly the sound became so extremely good that it was funny to think how much good the small Leben CS-300 can sing when all the system is put in the best conditions. To compare my Sony with what we had previously listened with the Tri (basically Summertime with Ella Fitzgerald and Luis Armstrong from the “Autumn in New York” hybrid SACD and the fourth movement of the Berlioz Fantastique Symphonie with Colin Davis and RCO) we started listening first the CD layer and only after we tried the SACD layer. Surprisingly both Faber and Nel Audio preferred the CD layer version! For me there were more things on the SACD layer, but they told that they were too “artificial”. Dunno, but that really impressed me... A part from that, it was quite clear that the Sony was able to retrieve more details (even as a CD player) and that the Tri was even lighter than my Sony on the bass response. Anyway, the tube used in the Tri output was able to give someway very nice mid-highs. So if you really don't need deep bass it is a very good CD player for the price (around 1600 Euro).
|
|
|
|
|---|---|---|
|
|
|
|
|
|
|
Is that the end of this long (1 year!!!) journey? I still don't know, maybe Mr C will surprise me with a variant of his Jocko-Homo I/V circuit...
Tino © August-December 2010
December 2011 update
|
|
|
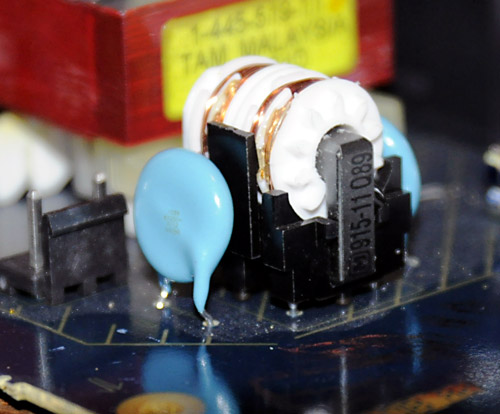
After one more year of listening I was happy with my TEA-Sony XA5400ES but sometimes I had the feeling that it was in someway constrained, in particular as bass impact. After reasoning on how to upgrade my AC conditioner I realized that the 10mH double coil that Sony put in series with the phase and the neutral cables could have a too small wire diameter (high AWG). So, I decided to try to short it and see if it was more detrimental to sound than useful in filtering AC noise. Well, I was really surprised by the result: bass became more authoritative and full of energy, but also the details in the high frequencies became more clear. That is really a no-brain mod that anyone should try on its Sony player or even in other class-2 players (I suspect that in many electronics there is such kind of filter, which is very negative for the sound). If you really want to filter AC wires for safe reason, then, please, use at least a 20 AWG coil!
 The
very last mod I thought was something that I wondered for a long
time. Is it good or not to connect the chassis of this player to the
earth wire? I asked that question to some “experts” and I
never understood well their answer. At the end I decided to try and
trust my ears. Yes, I was able to hear an improvement connecting the
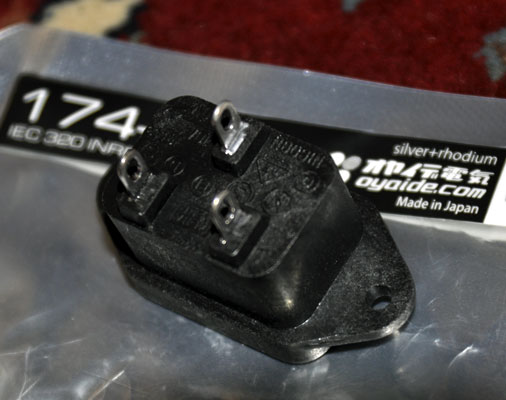
chassis to earth! So I decided to solder internally a silver plated
wire from earth to the central pin of my Oyaide IEC outlet and
connected it to the metal structure supporting all the boards. BTW,
during these last tests, and with the high performance reached by
this modded player, I discovered that the ERS Stillpoint cloth put
above the player was too much (it rolled-off the high frequency), so
that I lastly removed it, leaving small pieces only above the ICs.
The
very last mod I thought was something that I wondered for a long
time. Is it good or not to connect the chassis of this player to the
earth wire? I asked that question to some “experts” and I
never understood well their answer. At the end I decided to try and
trust my ears. Yes, I was able to hear an improvement connecting the
chassis to earth! So I decided to solder internally a silver plated
wire from earth to the central pin of my Oyaide IEC outlet and
connected it to the metal structure supporting all the boards. BTW,
during these last tests, and with the high performance reached by
this modded player, I discovered that the ERS Stillpoint cloth put
above the player was too much (it rolled-off the high frequency), so
that I lastly removed it, leaving small pieces only above the ICs.
With these last mods I thought that I have reached a satisfying sound and that I can stop here my quest. But after hearing the new tube based BFA DAC I understood that it is possible to hear digital sound even better! Maybe the only other way to improve further this project is to change the output devices to something better...
April 2012 update
After a few months a it came an email from a Australian audiophile (thanks Quan!), who was also modding his XA5400ES. He was interested in my mods but also suggested 3 new mods:
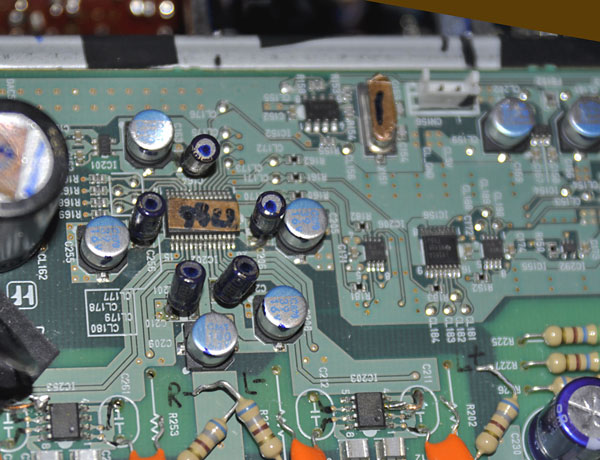
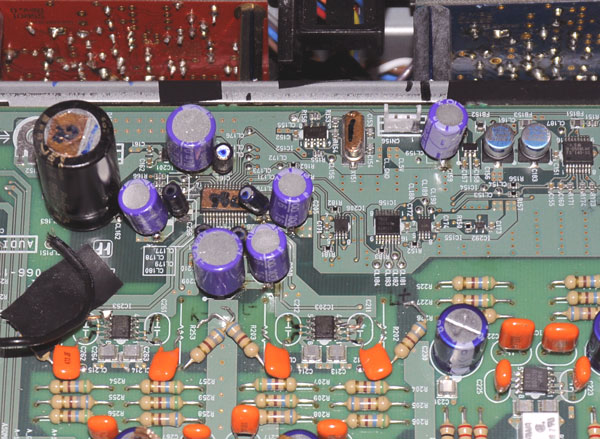
Replacing the electrolytic SMD capacitors around the DAC chip with better ones (I made to replace only the small ceramic caps, not the electrolytic).
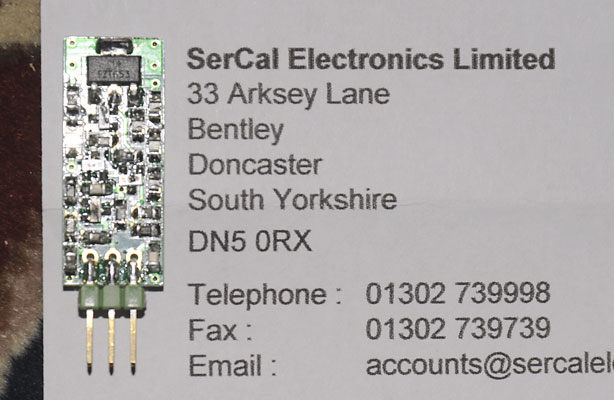
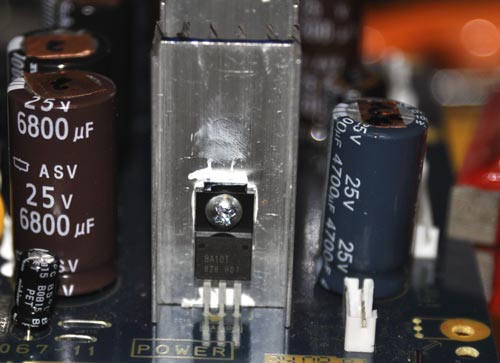
Replacing the 5V power supply regulator (a Rohm BA05T), used for both the DAC and the clock circuit, with a better one (he used a Fidelity Audio SPower Digital).
Replacing the clock circuit with a better one (he used a Fidelity Audio external clock board).
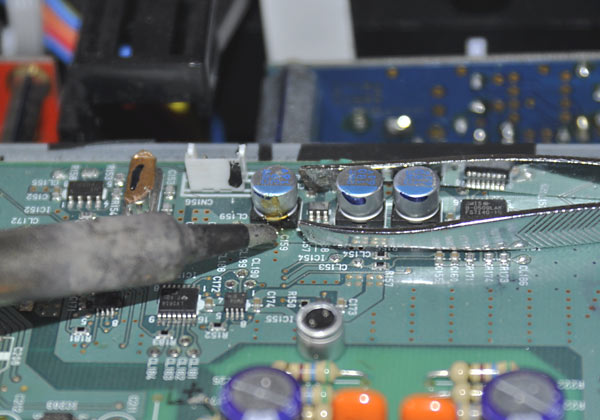
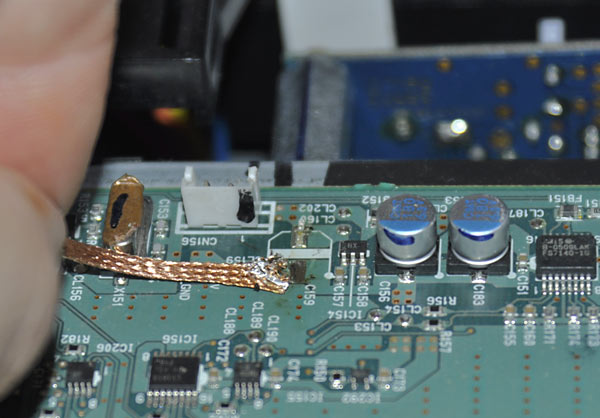
Since I'm a fan of improving the power supplies, I decided to implement his first two suggestions, because I made wonderful power supply for the output circuit... but it is true that the analogue signal is indeed coming out from the DSD-1796 DAC chip.Up to now I have not done those replacement first because I know that unsolder any SMD component would be a nightmare and second because I thought that the Rohm BA05T was already a very good regulator...
|
|
|
|---|---|
|
|
|
|
|
|
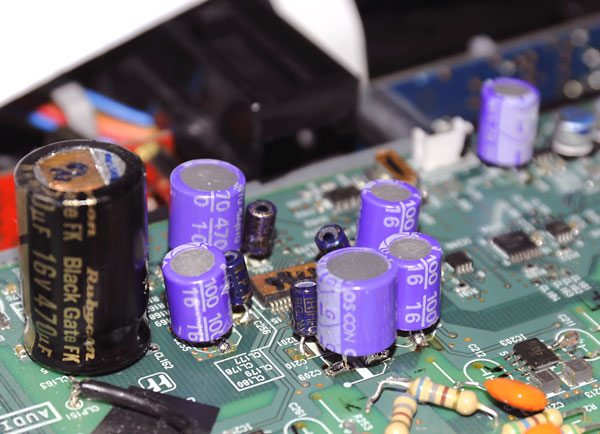
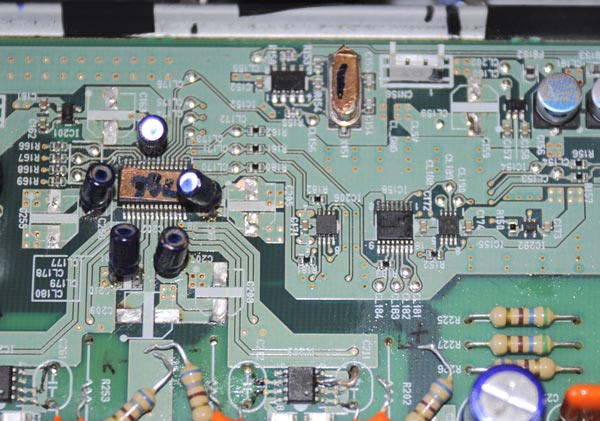
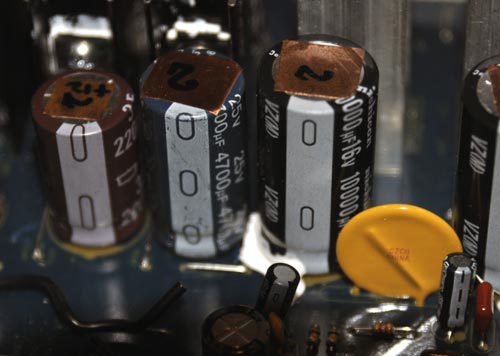
After replacing the 3x39uF 16V original caps (note that the blue strip marks the negative pin) with 3x Oscon 100uF 16V (2nd hand) and the 2x 180uF 10V with 2x Oscon 470uF 10V (BTW I did the same also with the 180uF of the clock circuit, C159) the sound of my player improved considerably. In particular, there were more energy and faster transients. Before the midrange and low frequency response was a little too much on the “light” side, but with these caps it improved a lot. Considering the low cost of these caps that is a no-brain mod!
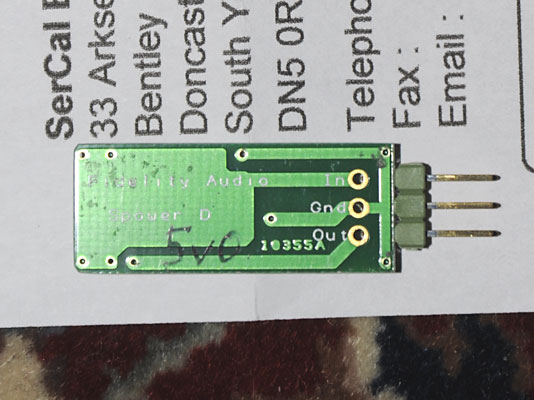
After removing the +-12V regulators (I'm already using the Sjöström SSR boards) and some caps I have enough space to mount a new regulator PCB also for the 5V power supply, but since I'm becoming lazy, I simply decided to follow Quan also in the second mod and bought a Fidelity Audio SPower D 5V regulator. These are discrete low noise regulators, made so small that they can fit the usual space of a 7805 IC chip; that is really a big commodity, even if they are not really cheap (the regular price is about 45 GBP). Fidelity Audio do not provide many technical info on this product, but Brent (owner) told me that that is not a copy of any other regulator design. So it should not be a simple son of the Walt Jung-series regulator. This design use a fast high current HEXFET as series output device and should handle 0.8W without heatsink. With my about 8.3V input voltage, that means a maximum of 250mA, that should be enough for the DAC and clock circuits.
|
|
|
|---|---|
|
|
|
|
|
|
After installing the Fidelity Audio 5V regulator the sound improved even more. In particular, I have noted even more details and even faster transients. I didn't thought to hear so much differences just replacing the Rhom BA05T IC with this small 3-pin PCB, but it really works! Thanks Brent!
Is that the real end? Who knows...
Tino © May 2012


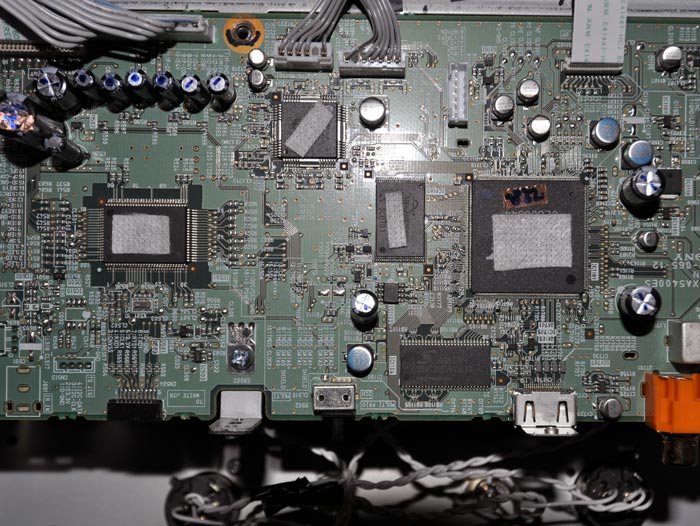
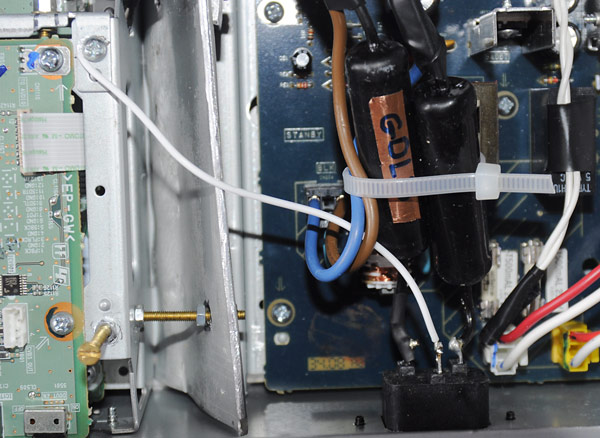
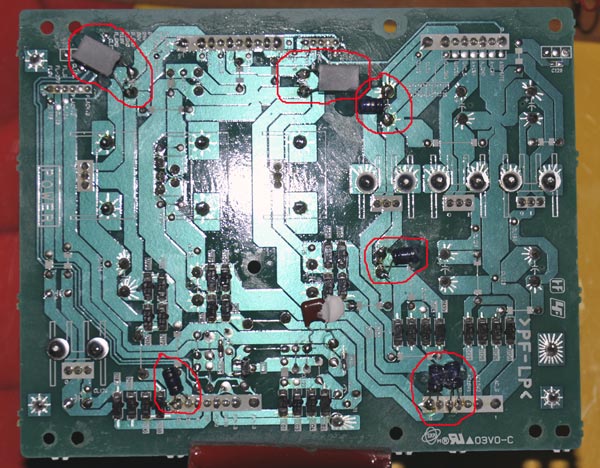 Cylindrical
caps: below are circled the 3x 0.1uF 50V Black Gate NX in // to
the rectifying diodes input (AC side); in the middle is the 0.1uF
50V Black Gate NX in // to C106, while above there is the 0.47uF
50V Black Gate NX in // toC117.
Cylindrical
caps: below are circled the 3x 0.1uF 50V Black Gate NX in // to
the rectifying diodes input (AC side); in the middle is the 0.1uF
50V Black Gate NX in // to C106, while above there is the 0.47uF
50V Black Gate NX in // toC117.