
Scaling Robots and Maps in USARSim[2006.07.19] |
 |
|
In short, you can change the robot scale in 2 ways:
The second solution is much easier than first because it allows to change the scale without editing and exporting again the 3d robot model. Using this method you can export your robots always at a fixed scale (say 250) and then rescale them as needed.
So, these are the steps you need to follow to change your robot scale using the second way:

If, for example, the old (actual) robot scale is 52.5uu/m and the new scale is 250uu/m, the correct factor will be:
![]()
This factor will allow to change your scale from 52.5 to 250 uu/m.
Every robot has one or more scripts that define its chassis and all the other parts.
A typical chassis script is:
class MyRobot extends KRobot config(USARBot);
	... //custom code
defaultproperties
{
	... //robot parameters
	StaticMesh=StaticMesh'...'
	Begin Object Class=KarmaParamsRBFull Name=KParams0
		... //various rigid body parameters
		KActorGravScale=1
		KCOMOffset=(...)
		Name="KParams0"
	End Object
	KParams=KarmaParamsRBFull'USARBot.MyRobot.KParams0'
}
and a typical part script is:
class MyRobotPart1 extends KDPart;

defaultproperties
{
	StaticMesh=StaticMesh'...'
	Begin Object Class=KarmaParamsRBFull Name=KParams0
		... //various rigid body parameters
		KActorGravScale=1
		KCOMOffset=(...)
		Name="KParams0"
	End Object
	KarmaParamsRBFull'USARBot.MyRobotPart1.KParams0'
}
All these scripts have a defaultproperties section. To change the scale you have to add to this sections (in all robot scripts) the parameter DrawScale and set it to the ScaleFactor:
defaultproperties
{
	DrawScale=4.762 //or any other scale factor you have calculated in Step 1
	...
}
If DrawScale is already defined, then simply multiply the old value with the new ScaleFactor. For example, if you find DrawScale=0.0126 then the new DrawScale value will be 0.0126*ScaleFactor, in this case 0.0126*4.762=0.06. DrawScale will scale both the visualized object and its collision primitives.
You have also to scale, in all robot scripts, the following rigid body parameters:
Now open USARBot.ini and find you robot section, something like [USARBot.MyRobot].
If you have mounted robot parts by UU (bMountByUU=true) then you must scale the following parameters:
I recommend to save somewhere the old values before scaling, I usually put them as comment at the end of the robot chassis script. These values will be your reference scale, you'll use them for any other scale change or adjustment.
Now you have only to compile USARSim. Go to UT2004\System, delete the USARbot.u file and execute "ucc make".
Open the map you want to scale in the Unreal Editor. Now select "Select All Actors" in the menu:
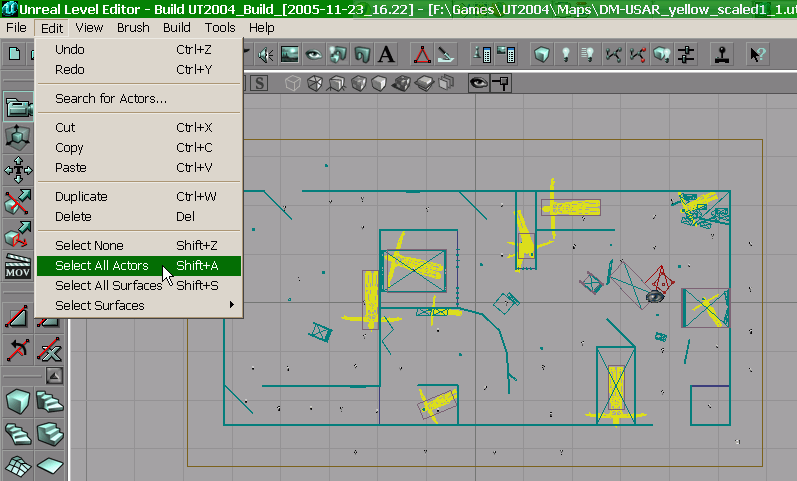 |
followed by "Scale Map...":
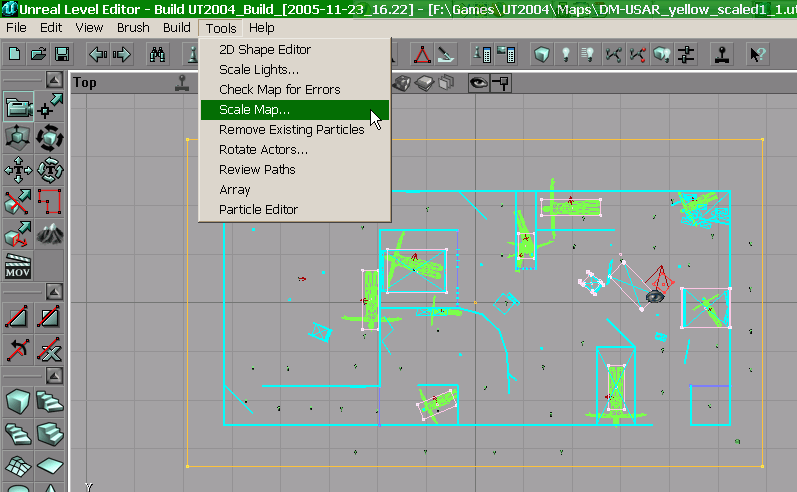 |
In the dialog box set the "Factor" value to ScaleFactor. I recommend to set the other boolean values like in the figure, the only think you should try is "Adjust Lights" and see what is better:
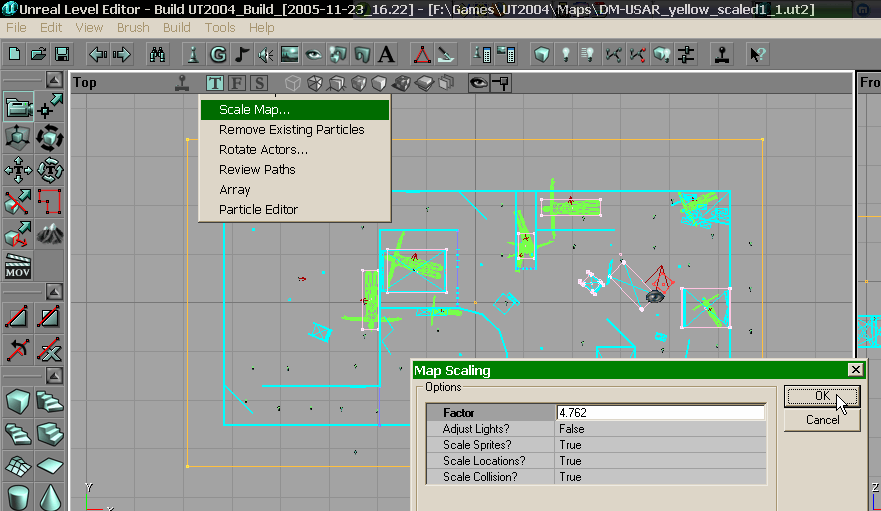 |
Now the map is scaled, however you'll see strange things, like this:
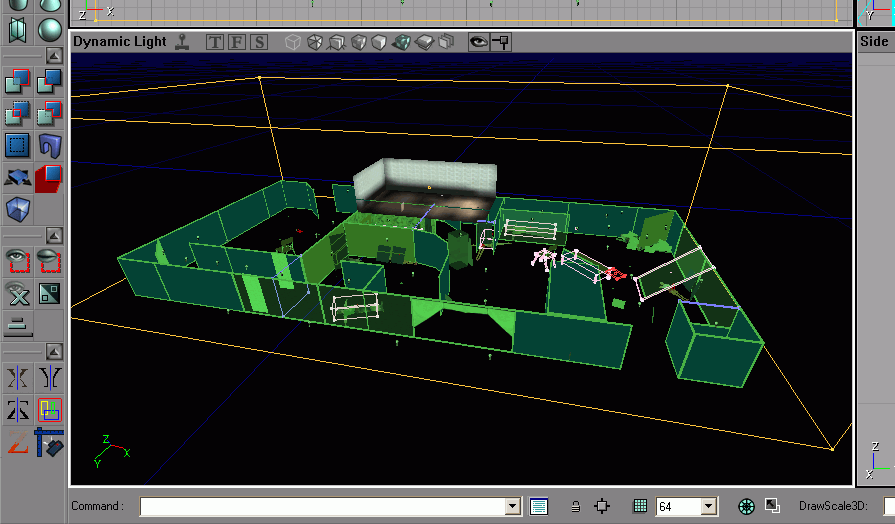 |
this is correct. You only need to rebuild the world:
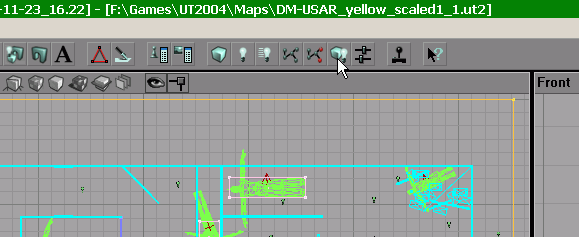 |
and you'll have your new scaled map:
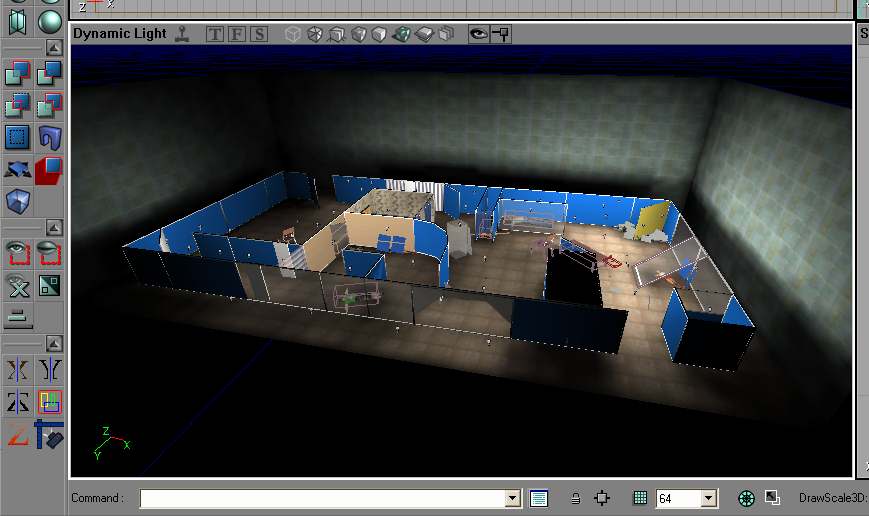 |
Adjust lights brightness and radius if needed.
If you use fluid surfaces (lake, oceans, rivers etc) and/or terrain then you have to scale them also. For every fluid surface open the FluidSurfaceInfo properties:
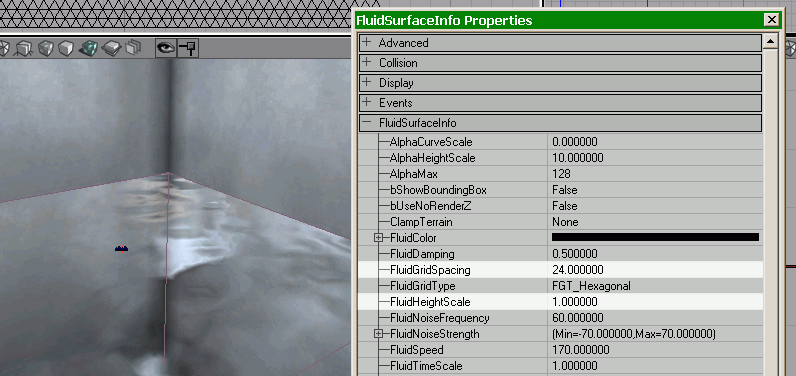 |
and multiply both FluidGridSpacing and FluidHeightScale by ScaleFactor. In this example FluidGridSpacing = 24 * 4.762 = 114.29 and FluidHeightScale = 4.762.
If you have terrain open the TerrainInfo properties:
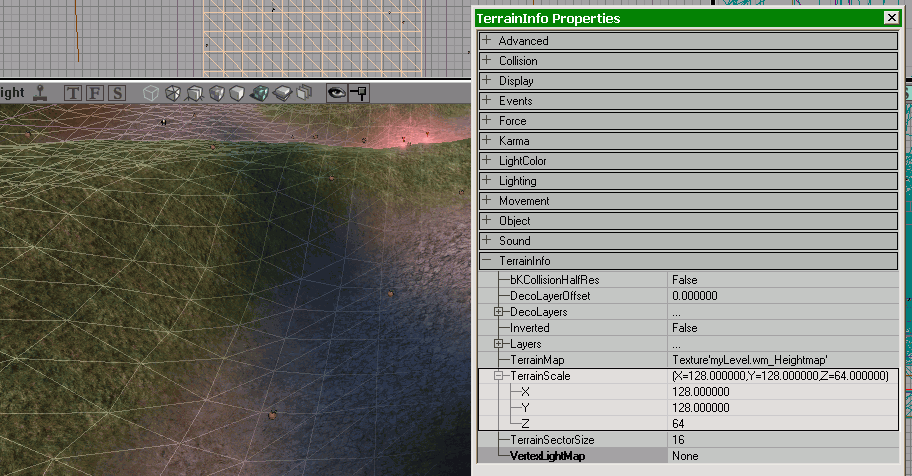 |
and scale TerrainScale X, Y and Z parameters by ScaleFactor. In this example X = 128 * 4.762 = 609, Y = 128 * 4.762 = 609, Z = 64 * 4.762 = 305.
If you scaled fluids and/or terrain rebuild the map. Now you're finally ready to save it, maybe with another name.