Upgrading the mechanics of the Conrad-Johnson DV-2b CD-player:
(06/01/2007)
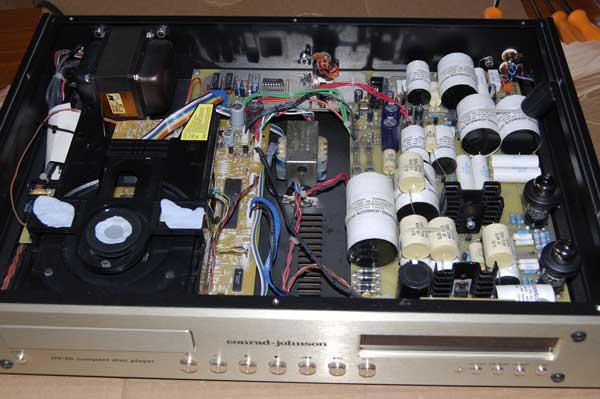
This page describes how it is possible to change the mechanic of your Conrad-Johnson DV 2b CD player and solve some related problems, but can be useful also to other people who own an old CD player and want to upgrade its Philips mechanic.
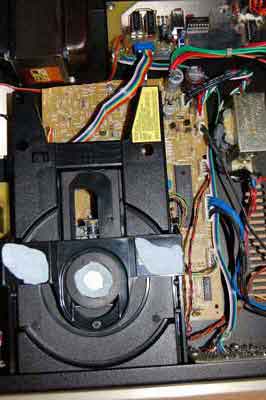
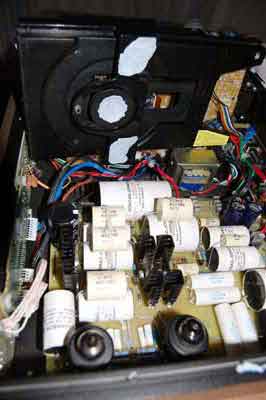
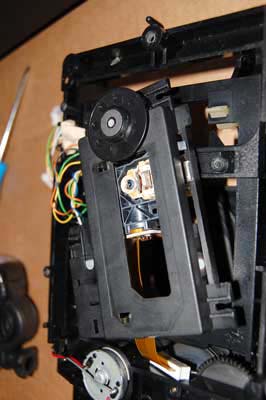
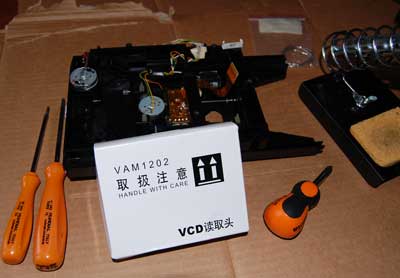
When I have bought my DV 2b as second hand, the previous owner told me that he has upgraded the original Philips CDM 12.1 mechanic to a “new” Philips VAM 1201 (j), because the old one was not able to read the PC-burned CDs. Now, after about 5 years from that upgrade, my DV 2b started to skip some tracks on some CDs and I thought that the laser was having some problems and that it was time to replace the VAM 1201 mechanic with a new one. Of course, in 2008 you can't find a new VAM1201, but it is quite easy to buy a new VAM1202, which is the Philips official replacement for the CDM 12 and VAM 12xx. I bought my new VAM 1202 for about 20 E + shipping cost from http://www.av-tv.de. The first two images show the open DV 2b (quite similar to the famous CJ Premier nine D/A) and the tools that you need, which are:
a cross screwdriver
the TORX 10 and TORX 15 screwdrivers
some silver (unleaded) solder and a solder station
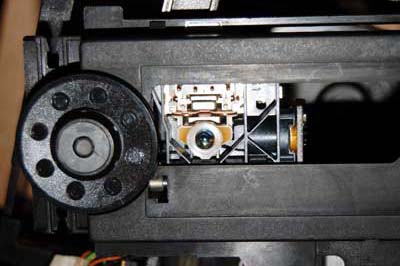
The CD mechanic is located inside the try loader, which is fixed above the controller circuit board, which I call simply loader board. To take out this board you have a cross screw at the bottom (near the main transformer), a T15 screw at the end of the loader and two cross screw below the CD player, just close to the front panel (these two screws fix a U-shape metal bar, where two loader foot are set).
|
|
|
|
|
|
|
|
|---|---|---|
|
|
|
|
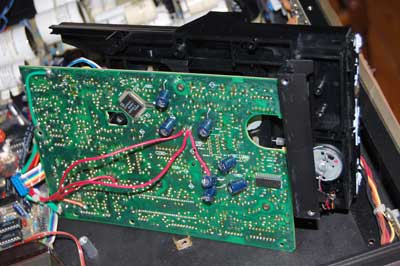
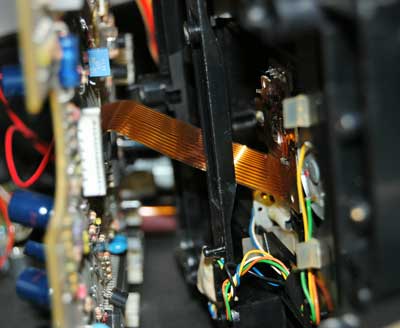
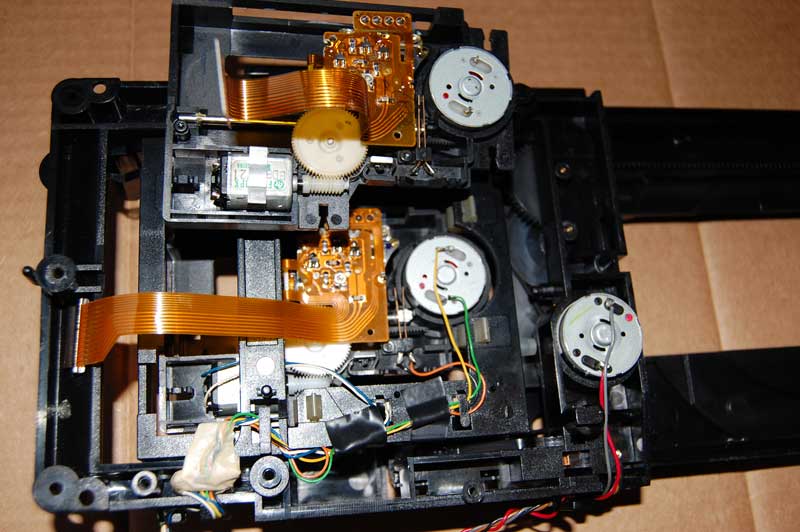
Once that you have taken out the circuit board you can separate the try loader unscrewing the three T10 screws located on the bottom of the board and unplugging (with much care!) the mechanic flat cable connected on the circuit board (components side).
|
|
|
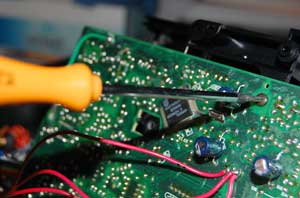
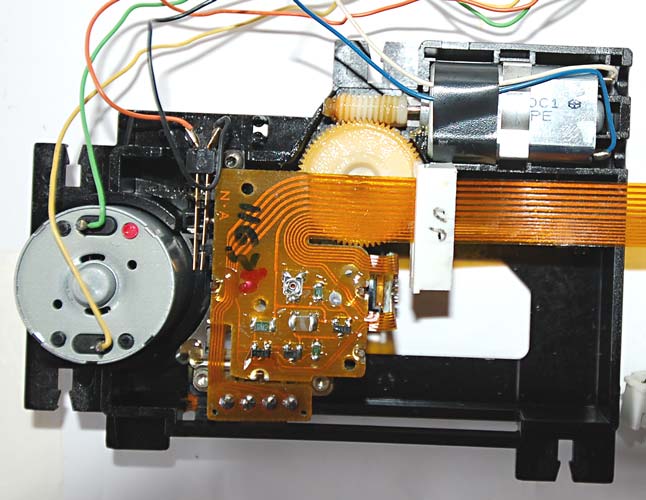
 When
you have the try loader in your hand you can finally plug in your
solder station. In fact there are 6 wires which you need to unsolder
from the old mechanic and resolder on the new one. How it is visible
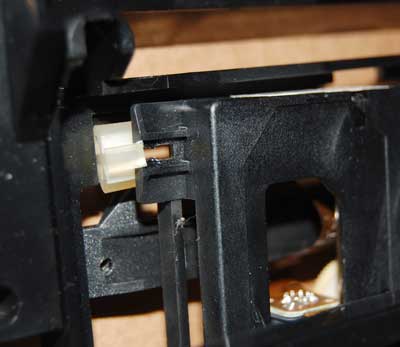
from the right picture, the mechanic is mounted on the loader by 4
silicone suspensions, which you need to push from the top side (with
the loader fully open). Be careful also with these four suspensions!
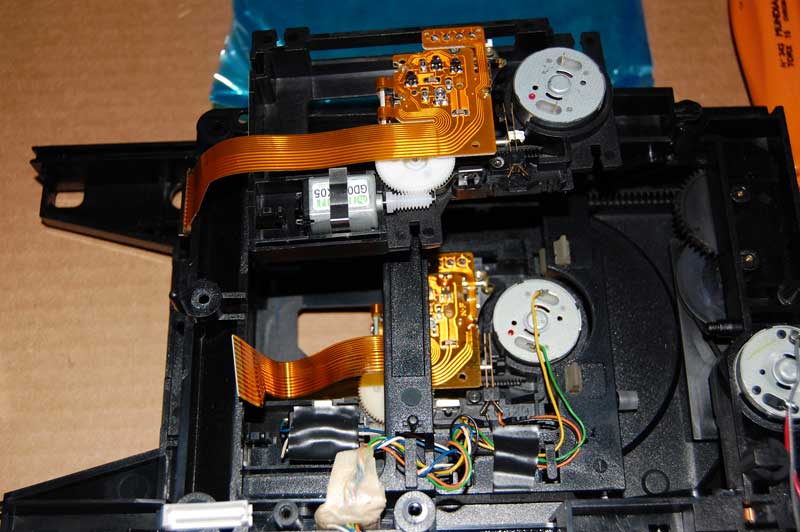
The 6 wires are connected as follows:
When
you have the try loader in your hand you can finally plug in your
solder station. In fact there are 6 wires which you need to unsolder
from the old mechanic and resolder on the new one. How it is visible
from the right picture, the mechanic is mounted on the loader by 4
silicone suspensions, which you need to push from the top side (with
the loader fully open). Be careful also with these four suspensions!
The 6 wires are connected as follows:
GREEN: positive (red mark) of the drive motor
YELLOW negative of the drive motor
ORANGE ending switch toward the drive motor
BLACK ending switch toward the sledge motor
WHITE marked (with a white dot) pole of the sledge motor
BLUE unmarked pole of the sledge motor
When you have unsoldered them you can replace the old mechanic with a new VAM1202.
|
|
|
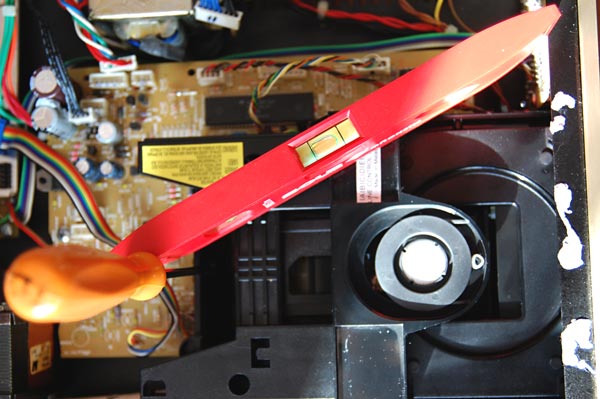
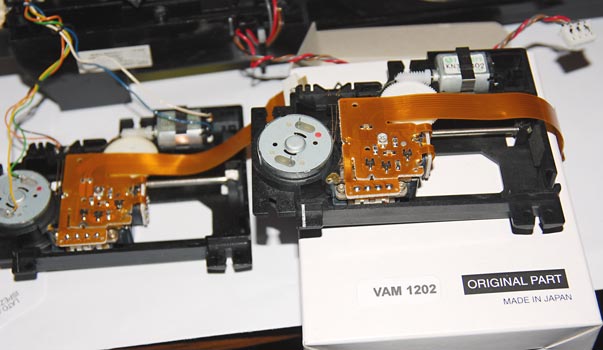
In this picture you can finally see the new VAM1202 installed in the try loader and the old VAM1201 above it, for comparison.
If you were successful you can remount everything and enjoy the sound of your new mechanic! Or not?
FIRST BIG PROBLEM: the turntable revenge!
 When
I have remounted everything I inserted a CD and the only thing I have
got was “READ” followed by “ERROR”. No way to
change this stupid message or to listen any music! To make it short
-but it wasn't!- I have to reopen everything to discover that the
mechanic turntable (this name sounds familiar, but not for a digital
source) didn't turn when pushed by my fingers. That was something
more than simple friction! Then I have studied the VAM1202 specs,
which you can find here
http://www.daisy-laser.com/products/CD/mechanisms/VAM1202/VAM1202_12V1.1daisy.pdf,
and decided to apply 5V to the drive motor pins. The only thing I
have got was some few sparks! No way to make rotate the turntable!
Then followed many cries and shouts. It happened when I was “playing”
with this bloody mechanic using some strength that the turntable made
an unexpected “click”. Click? And then it started
to rotate!
When
I have remounted everything I inserted a CD and the only thing I have
got was “READ” followed by “ERROR”. No way to
change this stupid message or to listen any music! To make it short
-but it wasn't!- I have to reopen everything to discover that the
mechanic turntable (this name sounds familiar, but not for a digital
source) didn't turn when pushed by my fingers. That was something
more than simple friction! Then I have studied the VAM1202 specs,
which you can find here
http://www.daisy-laser.com/products/CD/mechanisms/VAM1202/VAM1202_12V1.1daisy.pdf,
and decided to apply 5V to the drive motor pins. The only thing I
have got was some few sparks! No way to make rotate the turntable!
Then followed many cries and shouts. It happened when I was “playing”
with this bloody mechanic using some strength that the turntable made
an unexpected “click”. Click? And then it started
to rotate!
What have I done? I have lifted up the turntable, which was probably blocked down in some way. So, I was able to remount everything with my heart full of hope and when I started my CD player I really wasn't thinking to got a “NO DISC” message, but such is our desperate audiophile life. After some more crying and louding I have unmounted all another time, just to discover that this time the flat cable was not perfectly fixed in the loader board connector. Remounted everything I finally had my DV 2b playing. We were so happy that we decided to unwrap the Christmas present of my 4.5 months-old assistant (Mateja), which asked to her first Santa Clause a FIM XRCD of “Jazz at the Pawnshop” (yes, she really likes it!) and enjoyed its perfect reproduction to late night. Wonderful!
The morale is: before to mount a new mechanic in your CD player check if it turns when pushed by fingers!
THE DAY AFTER: a dirty work!
 We
were so happy the night before as desperate the following morning.
The DV 2b was skipping tracks an almost every CDs, including the Jazz
at the Pawnshop that the night before was playing perfectly. I
have not changed or moved anything!!! It seemed a bastard black magic
charm...
We
were so happy the night before as desperate the following morning.
The DV 2b was skipping tracks an almost every CDs, including the Jazz
at the Pawnshop that the night before was playing perfectly. I
have not changed or moved anything!!! It seemed a bastard black magic
charm...
After many cries I started to think (yes, sometimes -in desperate cases- I can do it!) and remembered. I remembered the cries that I have made almost five years ago when I have received my DV 2b from Germany and it... skipped tracks! Then, suddenly, I remembered an image of a dirty work. It was me,with the Philips mechanic in one hand and a grease bottle in the other. Some neural synopsys started to activate in my brain. Then -again- I unmounted everything, take the mechanic out of the try loader and started to put that dirty grease on the sledge motor gear and pivot ax. In fact, it is a mechanic! When I have remounted everything for the countless time the DV 2b was playing as perfectly as the night before and -yes!- it has done the same also the following days! Why the first night it was working and the day after morning not? Probably there was just a few fabric oil (spread by the first use), which during night evaporate or something like that. Then I started to think why I have done all that work. Because the VAM1201 mechanic was skipping bytes. But it was due to the old laser, as I have thought, or it was just that the grease that I gave it almost 5 years ago was finished?
The morale is. if you have a Philips mechanic which skips some music, try to put some grease (or machine oil) in the sledge mechanical parts before to replace it!
IMPORTANT UPDATE: oil is better!
10 days after that work the mechanic started to have some problems in the first and last tracks of each CDs. Probably the grease was accumulated at the beginning and end of the sledge ax. Then I reopen -again!- everything, take out the grease and put some gear oil. It is much better!
THE VERY LAST UPDATE: (December 2008 – February 2009)
 After
some months the new VAM1202 mechanic started to skip bits here and
there, also on really new CDs. I had two options: to open it and add
some oil or to replace it another time. I choose the last one, but
this time I was able to find in an italian electronic shop (Audio
Shop, Torino) a Philips VAM-1202 which was “Made in Japan”,
instead than in “China”, as was written in that bought in
Germany one year before. When I received it I immediately checked the
turntable and - what a joy- it was turning just with a finger tip. I
installed it following the instruction above, but without putting any
oil in the ax. Believe me or not, it worked at the first trial. This
time I was really happy, until... after some weeks also this new
mechanic started to skip data and rapidly become worse than the
previous mechanic. Noo!!!
After
some months the new VAM1202 mechanic started to skip bits here and
there, also on really new CDs. I had two options: to open it and add
some oil or to replace it another time. I choose the last one, but
this time I was able to find in an italian electronic shop (Audio
Shop, Torino) a Philips VAM-1202 which was “Made in Japan”,
instead than in “China”, as was written in that bought in
Germany one year before. When I received it I immediately checked the
turntable and - what a joy- it was turning just with a finger tip. I
installed it following the instruction above, but without putting any
oil in the ax. Believe me or not, it worked at the first trial. This
time I was really happy, until... after some weeks also this new
mechanic started to skip data and rapidly become worse than the
previous mechanic. Noo!!!
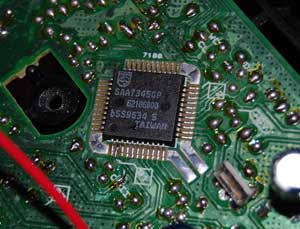
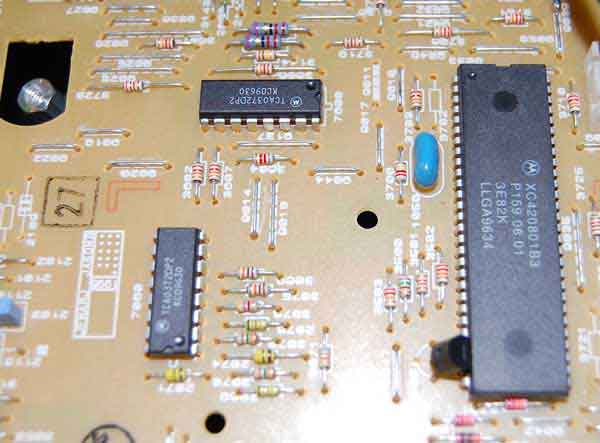
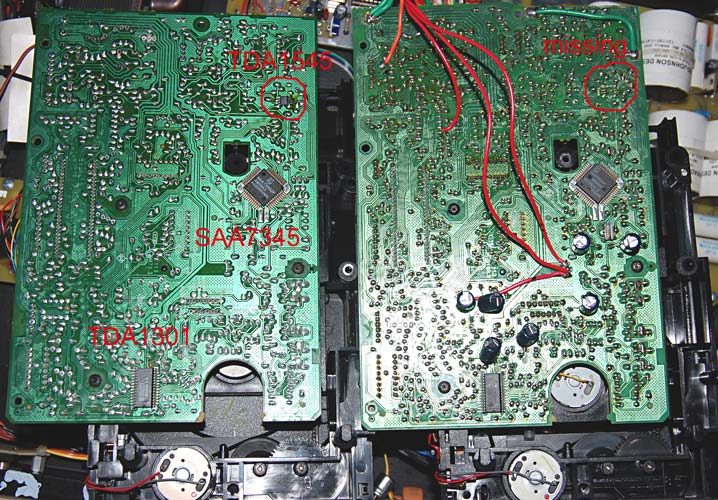
It was too much. This time I decided to solve the problem forever. First, I discovered something more on the board where the mechanic (Philips L1210/11 tray loader + VAM1202) are connected. With some lucky I discovered that this board was taken from a Philips CD720 player (or Marantz CD46, about 1995 year). This board was a full CD player, having the TDA1301 controller chip, the SAA7345GP receiver and the TDA1545A DAC (SMD version of the famous TDA1541 16 bit DAC). CJ desoldered the 1545 DAC (and all the OP-based output stage) and connected the digital stream (probably via I2S) to his board where a new clock and a TDA1305 bitstream DAC are accommodated. BTW, the 1305 has an output made via OP, which implements also the I/V conversion and the low pass analogue filter, so that the only external components are the 1nF caps used in the first order filter. Then, the CJ tube circuit is fundamentally a buffer stage.
|
|
|
|---|---|
|
|
|
|
|
|
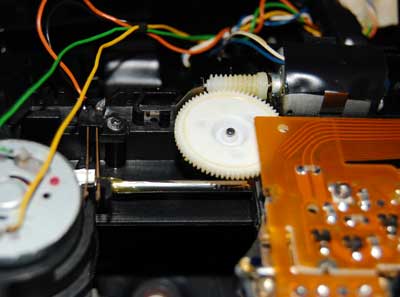
With other luck I was able to buy on eBay an old CD720 in perfect working conditions. Then I take out its very old CD12.1 mechanic and L1210/11 tray loader and put it into my CJ DV-2b and, since then, it never skipped a bit! Since I was suspecting that the problem could be in my original tray loader, I also tried to put the new VAM1202 on the Philips CD720 tray loader, but it was skipping data as a mad. So there are two possibilities: or all the VAM120x which Ihave bought on eBay are “defect” or you the VAM1202 is not an exact replacement for the old CD12.1 (see the picture above, where the two motor axis are shifted), and you should better to buy a cheap old player and cannibalize its mechanic.
Upgrades:
|
|
|
During this upgrade I replaced also the output RCA female connectors (panel sockets) with two silver amagnetic Audio Note (about 10 E each, plus Cardas 15AWG internal wire) and had the net feeling that the sound has improved. So, I suggest to owners of these CD-player, or similar, to improve their RCA connectors with silver AN, or, if they pretend the best, with WBT Next Gen...
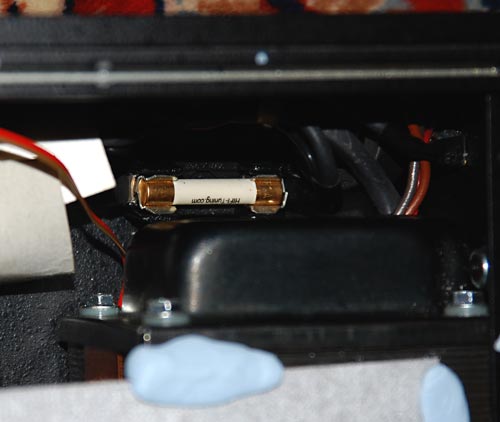
Also, I have found clearer highs using a Hi-Fi Tuning ceramic-Ag fuse (1A fast blow 3AG) and in particular a better sound with the Stillpoint ERS cloth above the digital circuits. Both were effective to improve the DV-2b sound, but it never become close to that of my analogue source... sigh!
Tino © January 2008 – February 2009