Multi View[2007.01.15] |
|
|
The USARSim client allows to see only from the camera(s) of one robot at the time. To overcome this limitation a special extension, called MultiView, was developed. This extension is not new, it's several months that it is included in the simulator. As no documentation still exists on how to use it I'm writing this short guide.
In order to enable the MultiView you have to add a special object into the map. You must use the Unreal Editor to do that. Open your map in the Unreal Editor (I will use the Soccer map as an example):
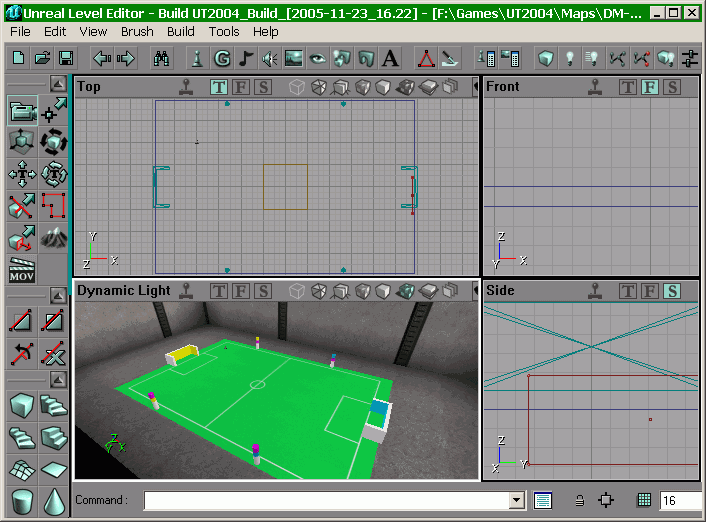 |
Fig.1 |
Click on the pawn button as illustrated. It will open the Actor Classes window:
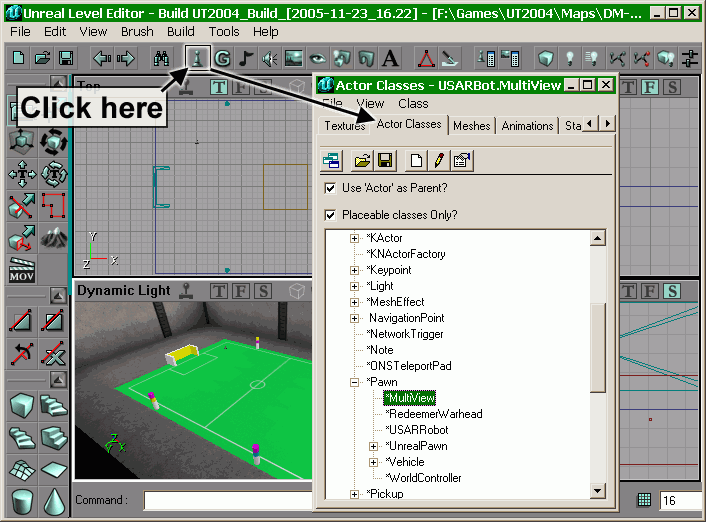 |
Fig.2 |
In the tree view search for MultiView and select it. The path to it is Actor/Pawn/MultiView. Now right click somewhere in the map (in the perspective view) and select "Add MultiView Here":
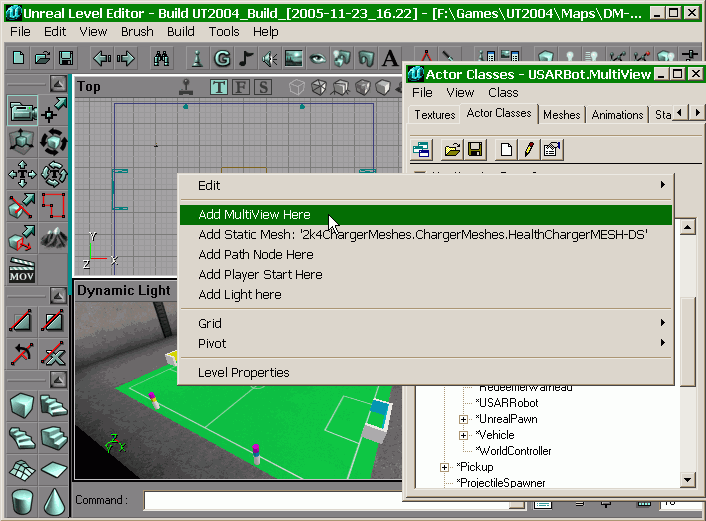 |
Fig.3 |
Close the Actor Classes view. The following box should have appeared in the map:
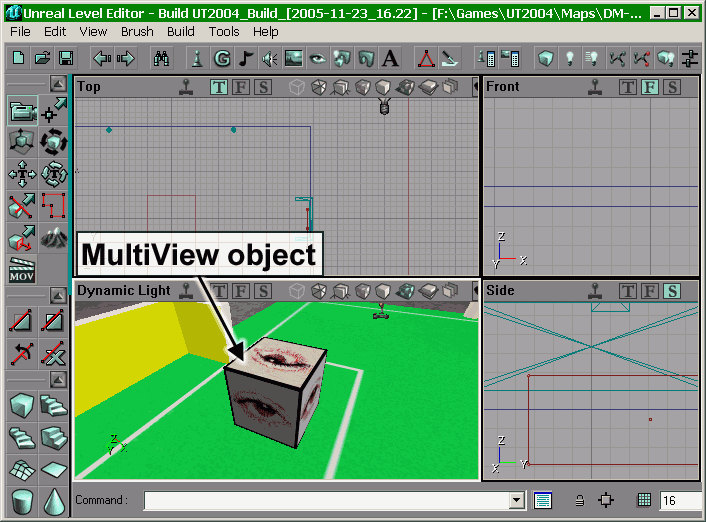 |
Fig.4 |
You can place it wherever you want, for example near the ceiling so to hide it from robot cameras. Now click on the rebuild button to rebuild the map:
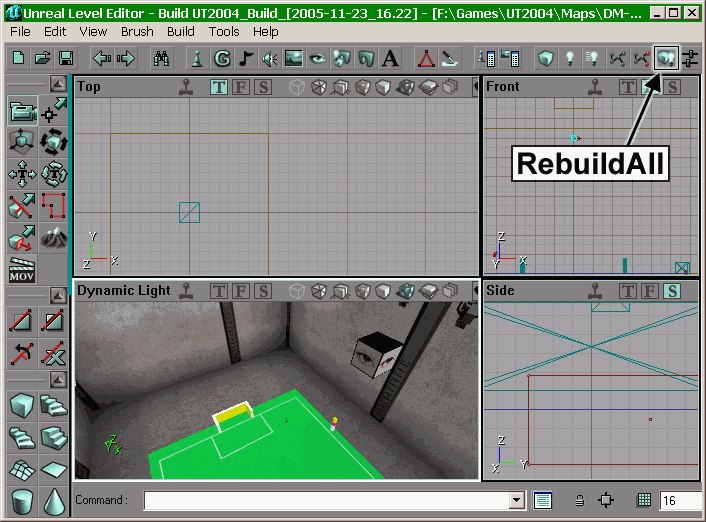 |
Fig.5 |
and save it.
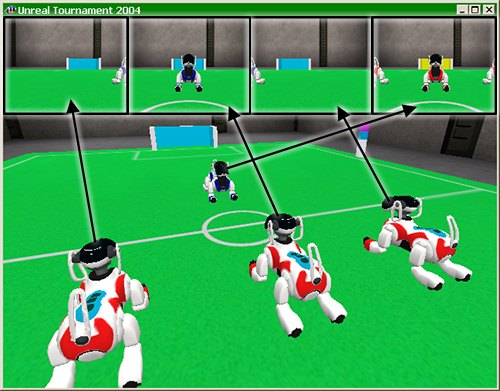
With MultiView you can capture the camera view from many robots at the same time as illustrated in the following picture:
Fig.6 |
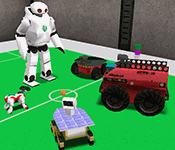
Just keep left clicking until you find it. You can write your own capturing image server, extract the images of each robot and send them to respective clients, as illustrated here:
Fig.7 |
Otherwise you can use the image server that comes with USARSim and split the camera images at client side.
MultiView can also render stereo cameras in each subview. To do so you have to add this function to your robot class (subclassed from KRobot):
//(Called by KRobot Tick function)
//Stereo vision when viewing from multiview robot camera
simulated function SyncMultiView()
{
    if(ViewManager != none)
    {
        if(isStereo)
            ViewManager.UpdateView(ViewNum, myCamera.Location, myCamera.Rotation,
                                   CameraZoom, true, uuStereoSpacing);
        else
            ViewManager.UpdateView(ViewNum, myCamera.Location, myCamera.Rotation,
                                   CameraZoom, false);
	}
}
where:
simulated function ConvertParam(USARConverter converter)
{
    Super.ConvertParam(converter);
    if(converter!=None)
    {
        uuStereoSpacing = converter.LengthVectorToUU(stereoSpacing);
    }
    else
    {
        uuStereoSpacing = stereoSpacing;
    }
}
where:
You can define a vector in defaultproperties like this:
defaultproperties
{
    ...
    stereoSpacing=(Y=0.05) //5 cm: (eye to eye)/2 spacing in meter
    ...
}
You can configure the MultiView in the USARBot.ini file. You will find the [USARBot.MultiView] section that contains the following parameters:
I can think of two important limitations:
![]()